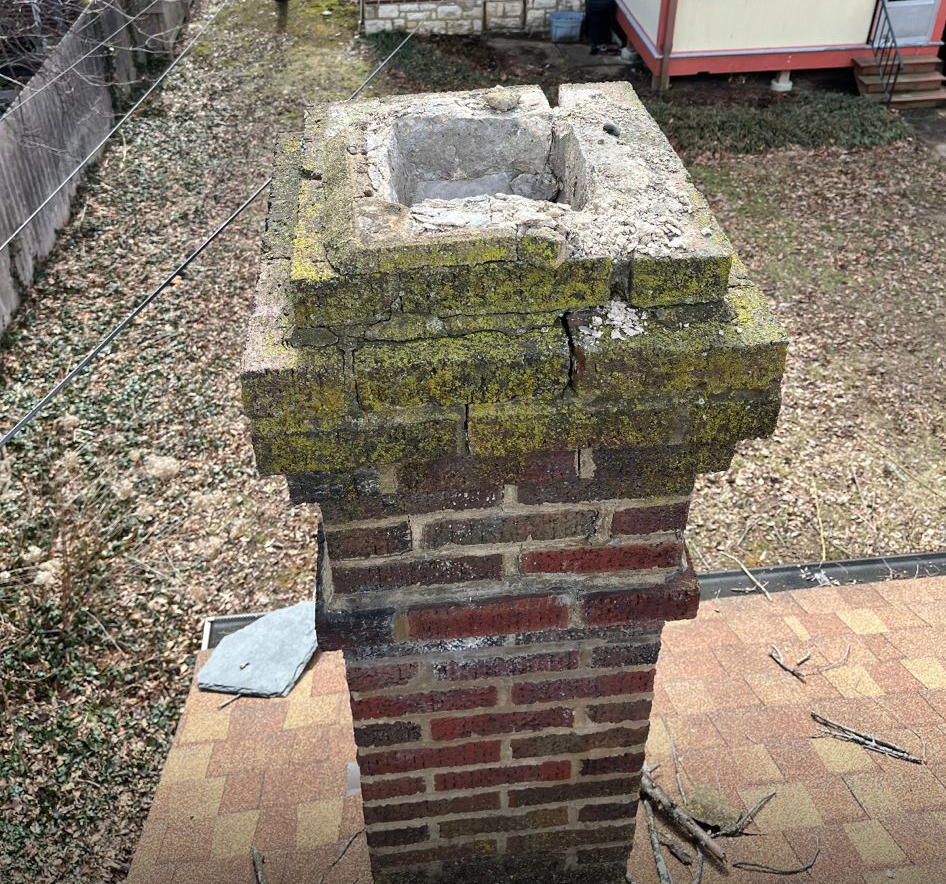
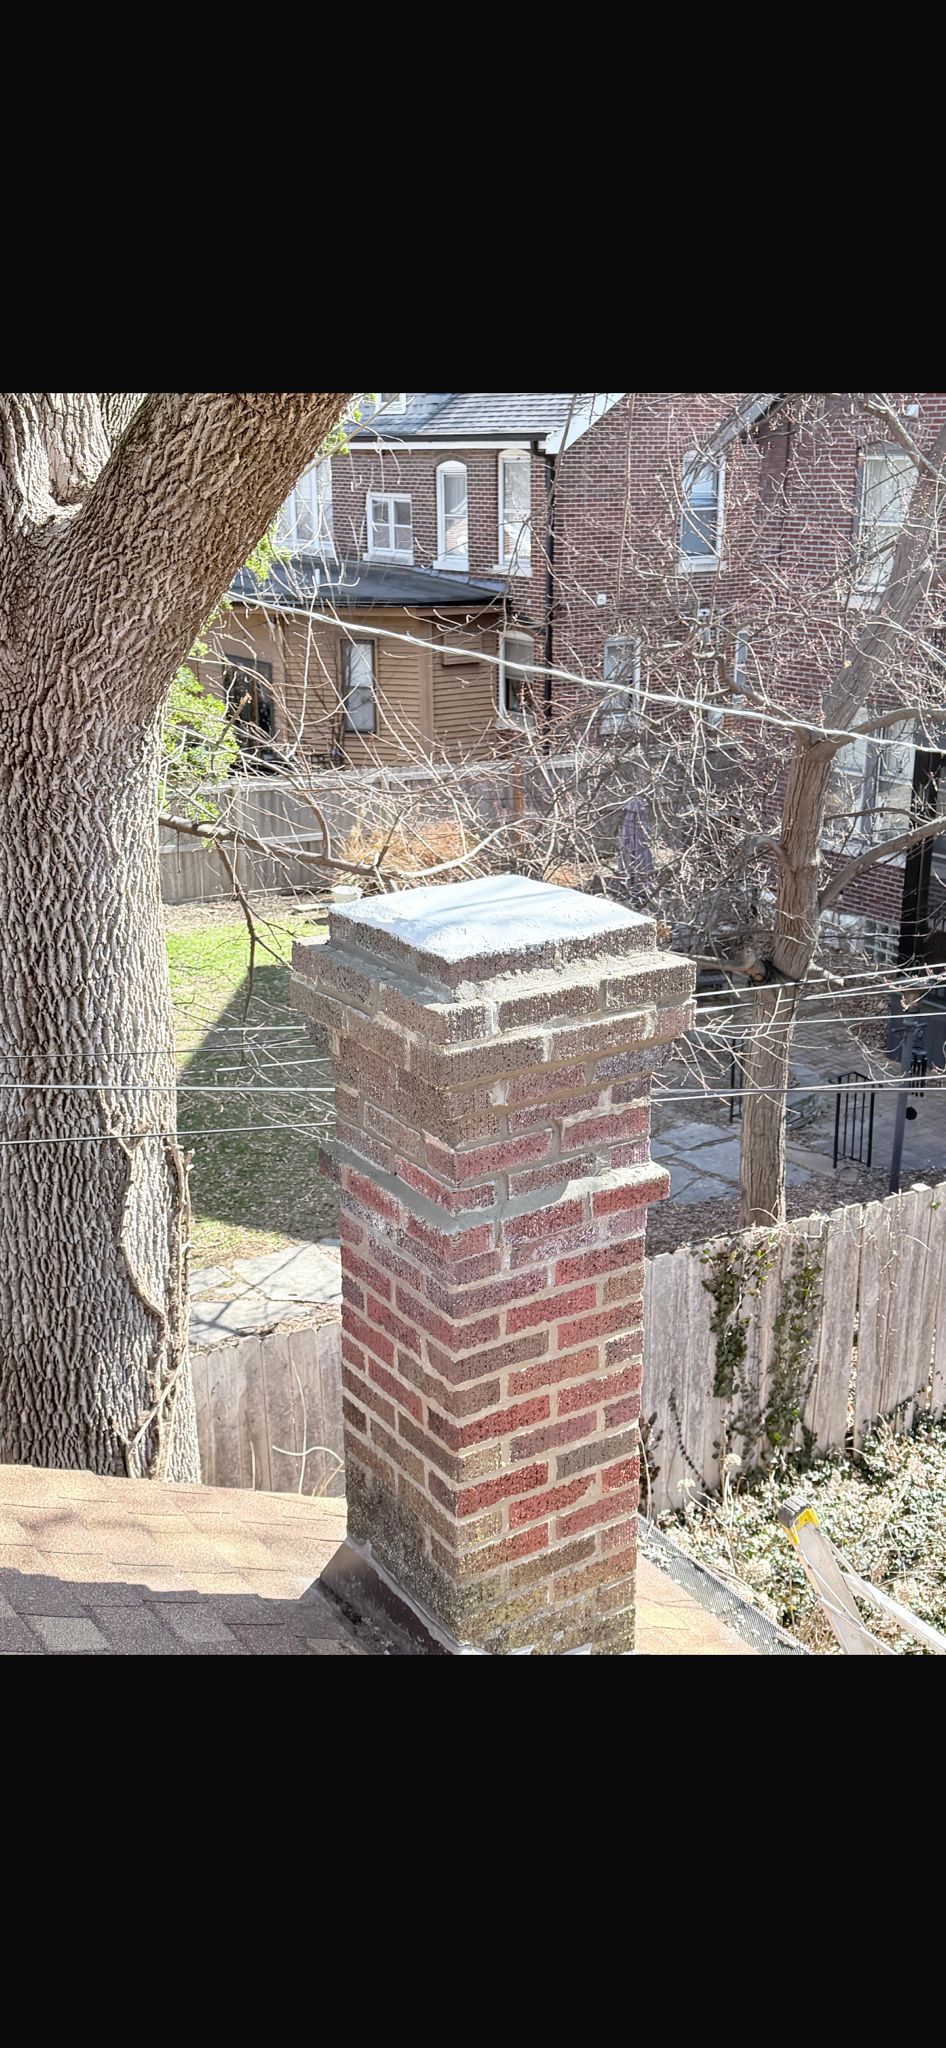
A complete structural restoration, taking an unsafe, crumbling structure through the rebuilding process to a flawless, sealed finish.
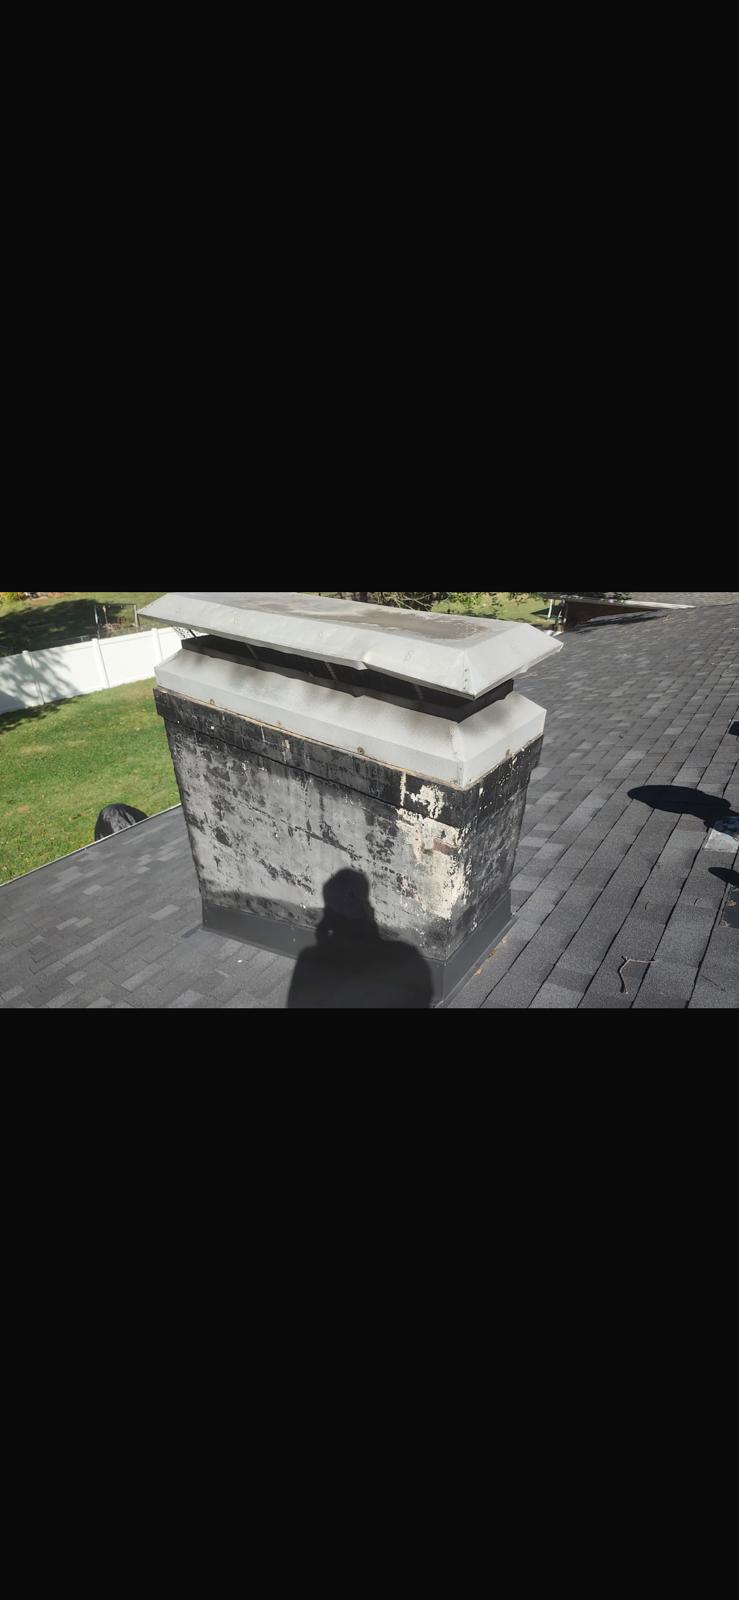


Grinding out deteriorated mortar joints, matching the structural integrity, and installing a custom-fabricated chase cover to permanently stop leaks.
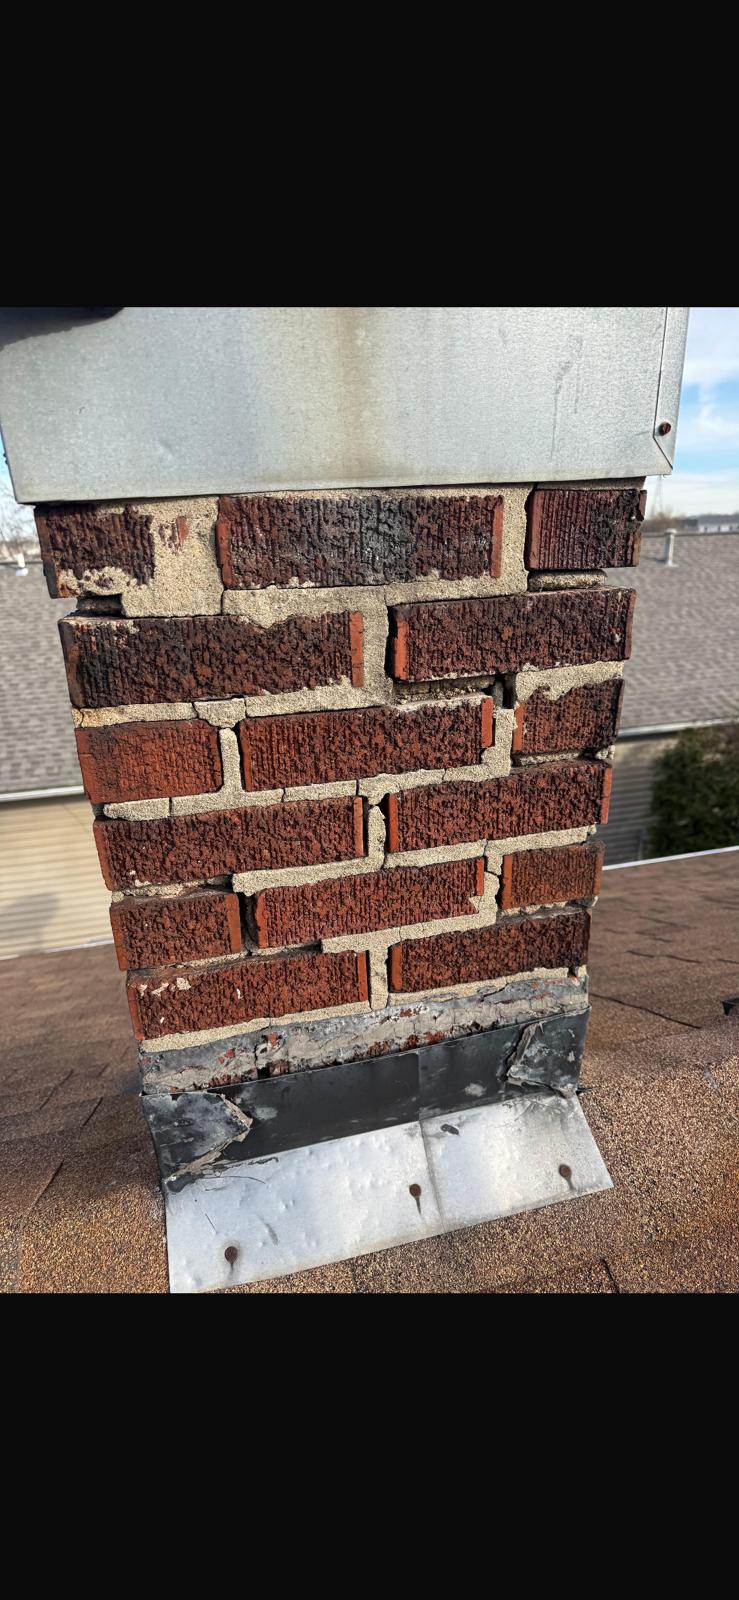
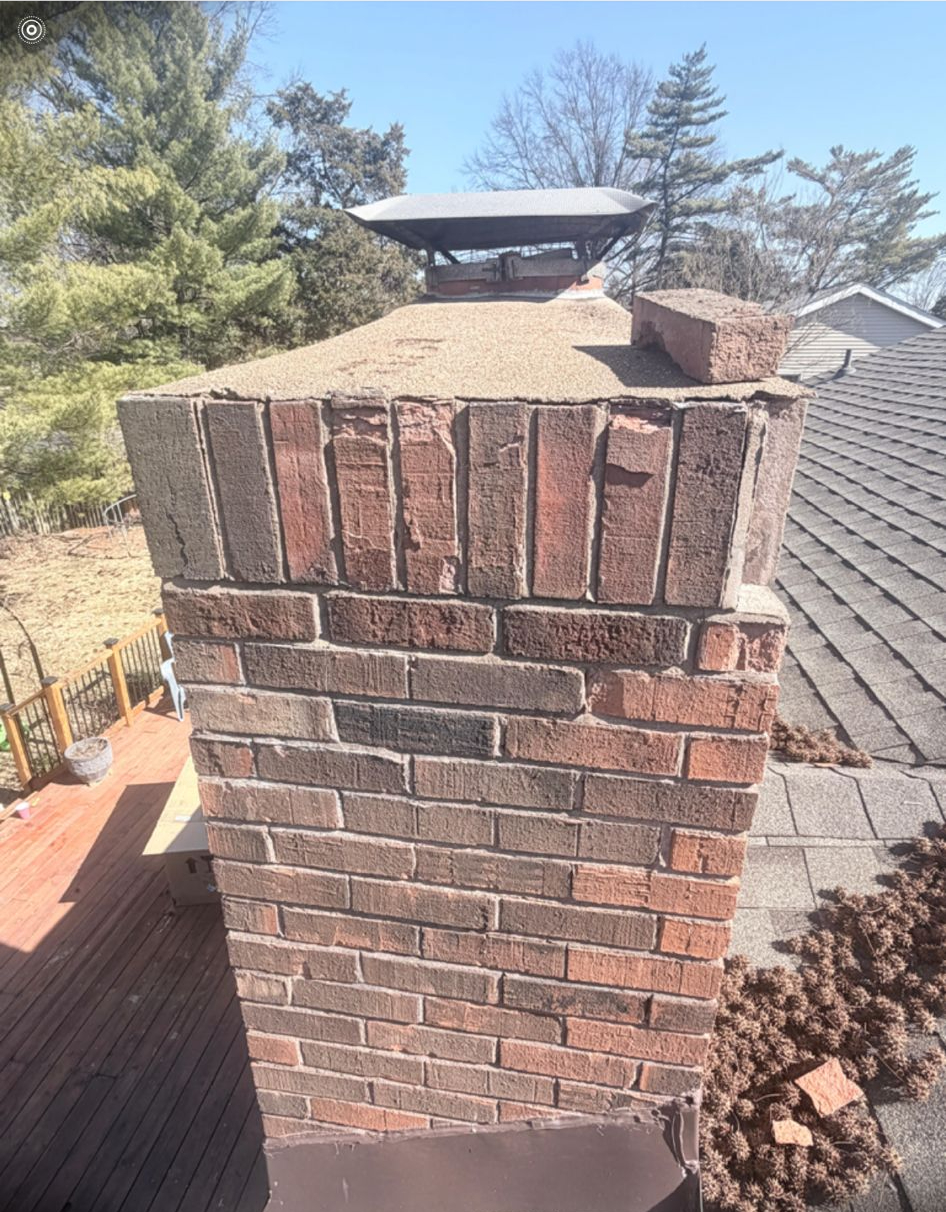
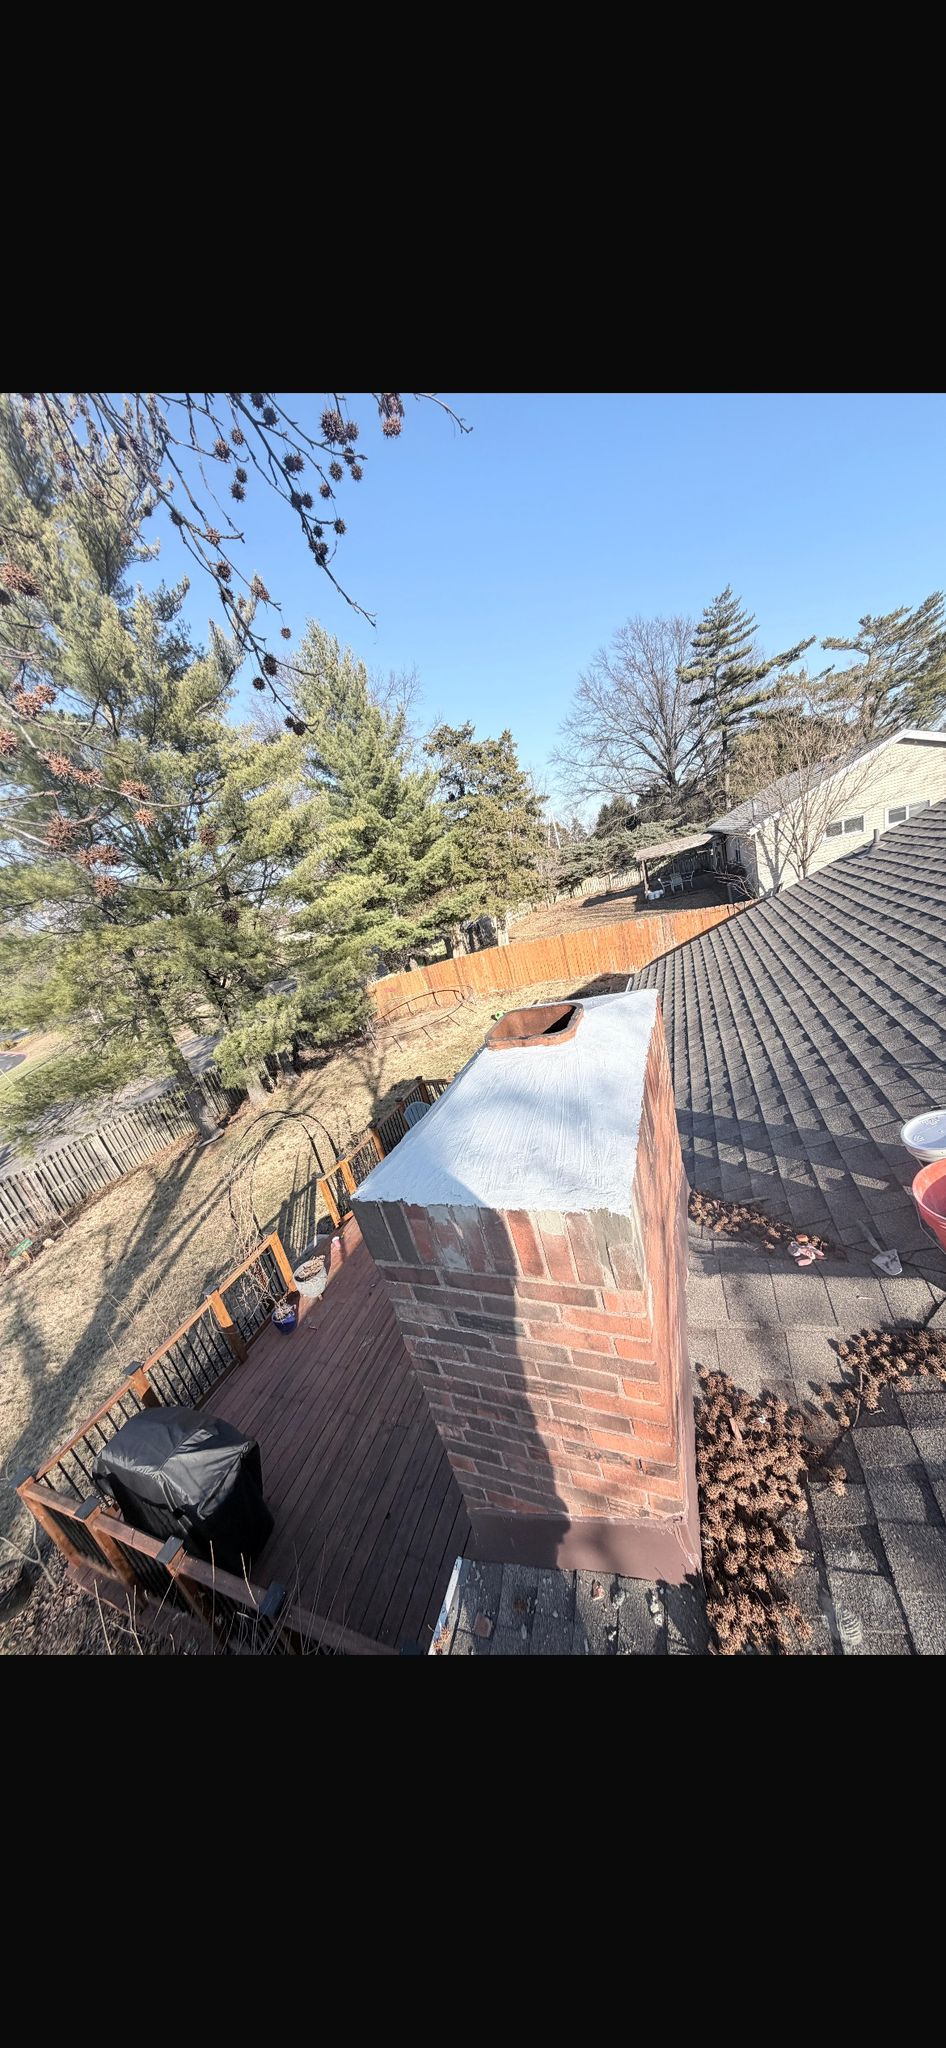
Removing severely cracked and degraded concrete crowns that allow water damage, and casting a brand new, weather-tight crown.
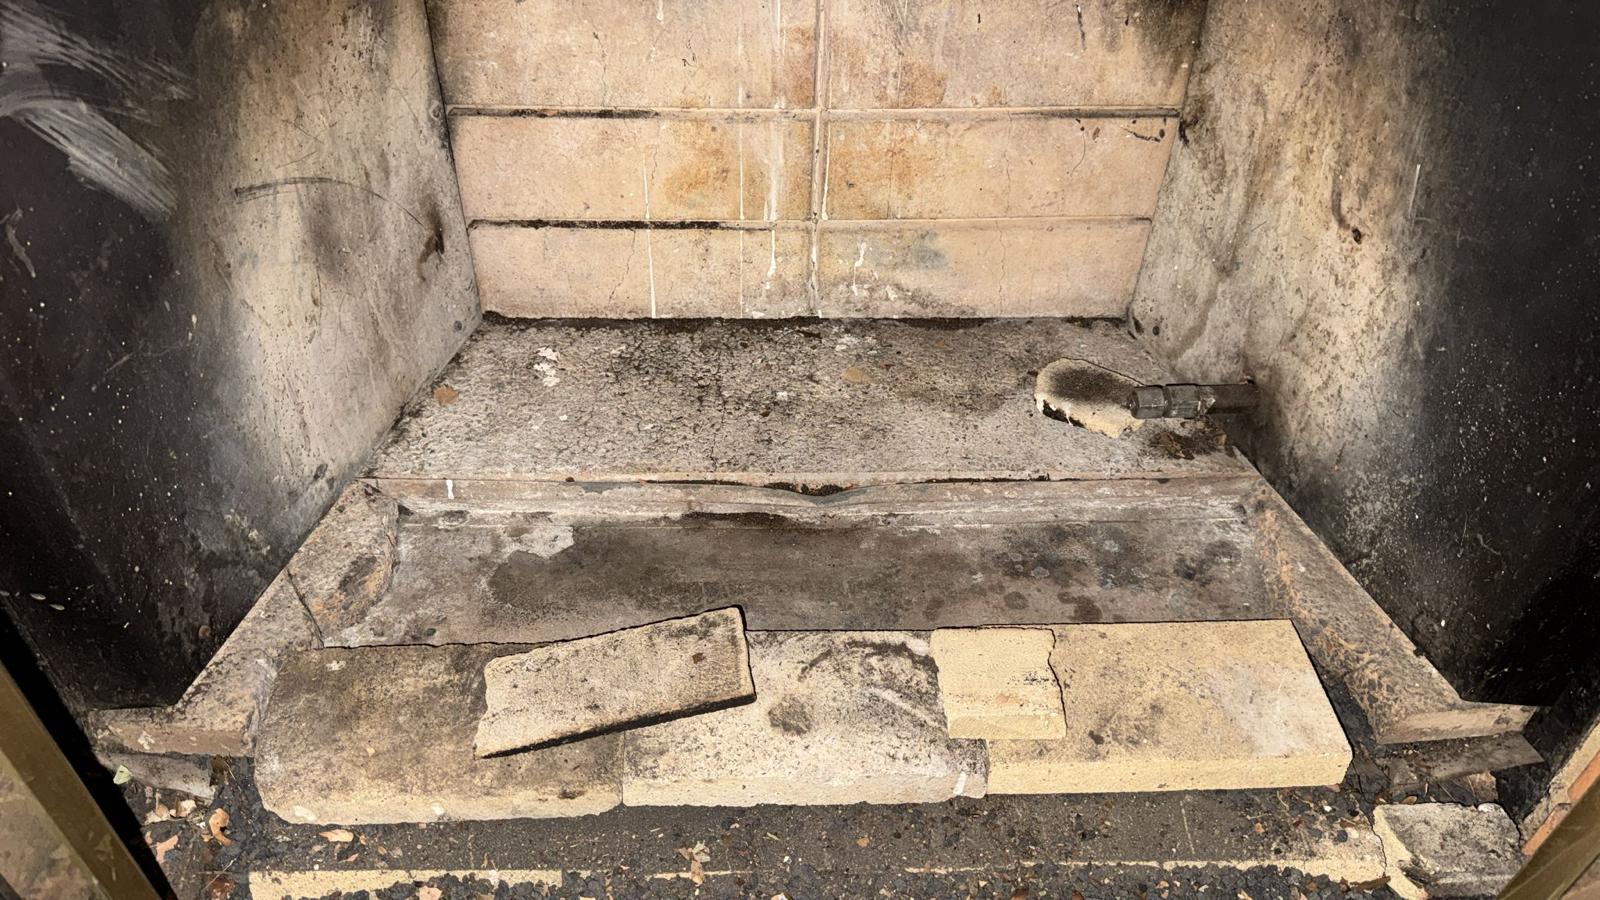
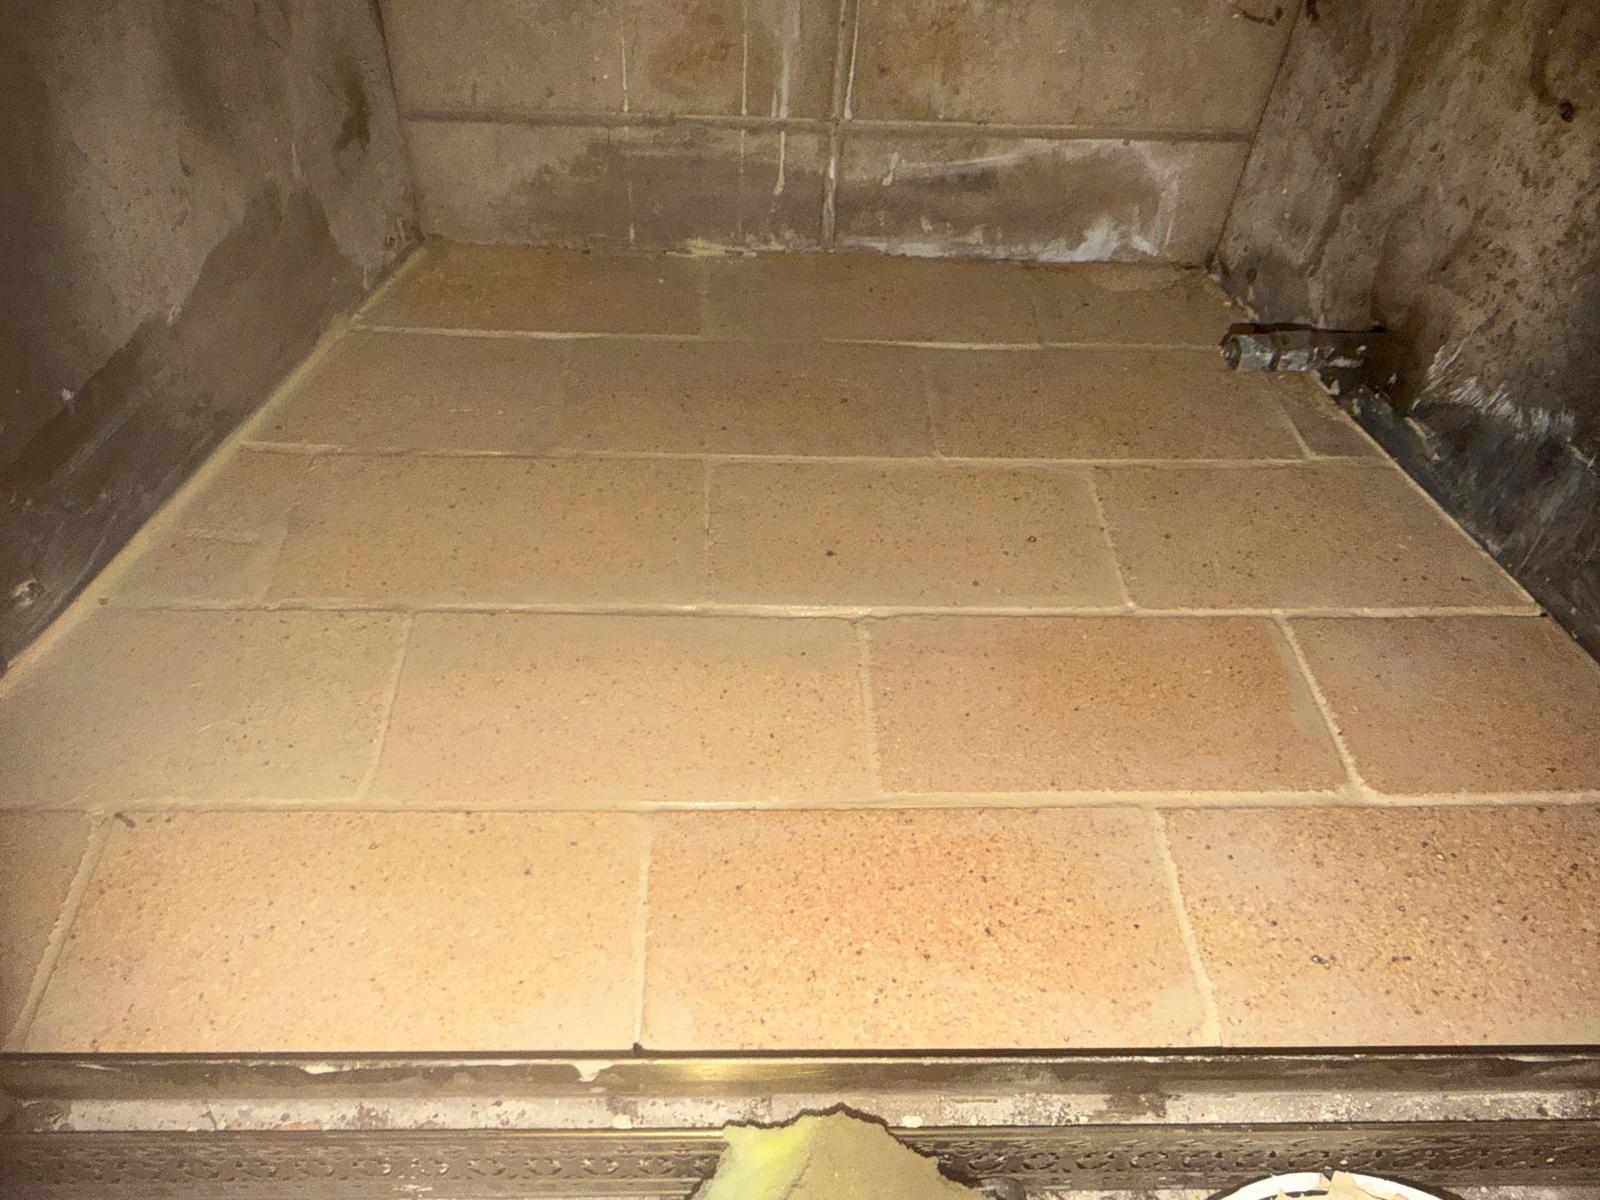
Replacing cracked and dangerous refractory panels inside the firebox to ensure safe, efficient burning without heat transfer risks.
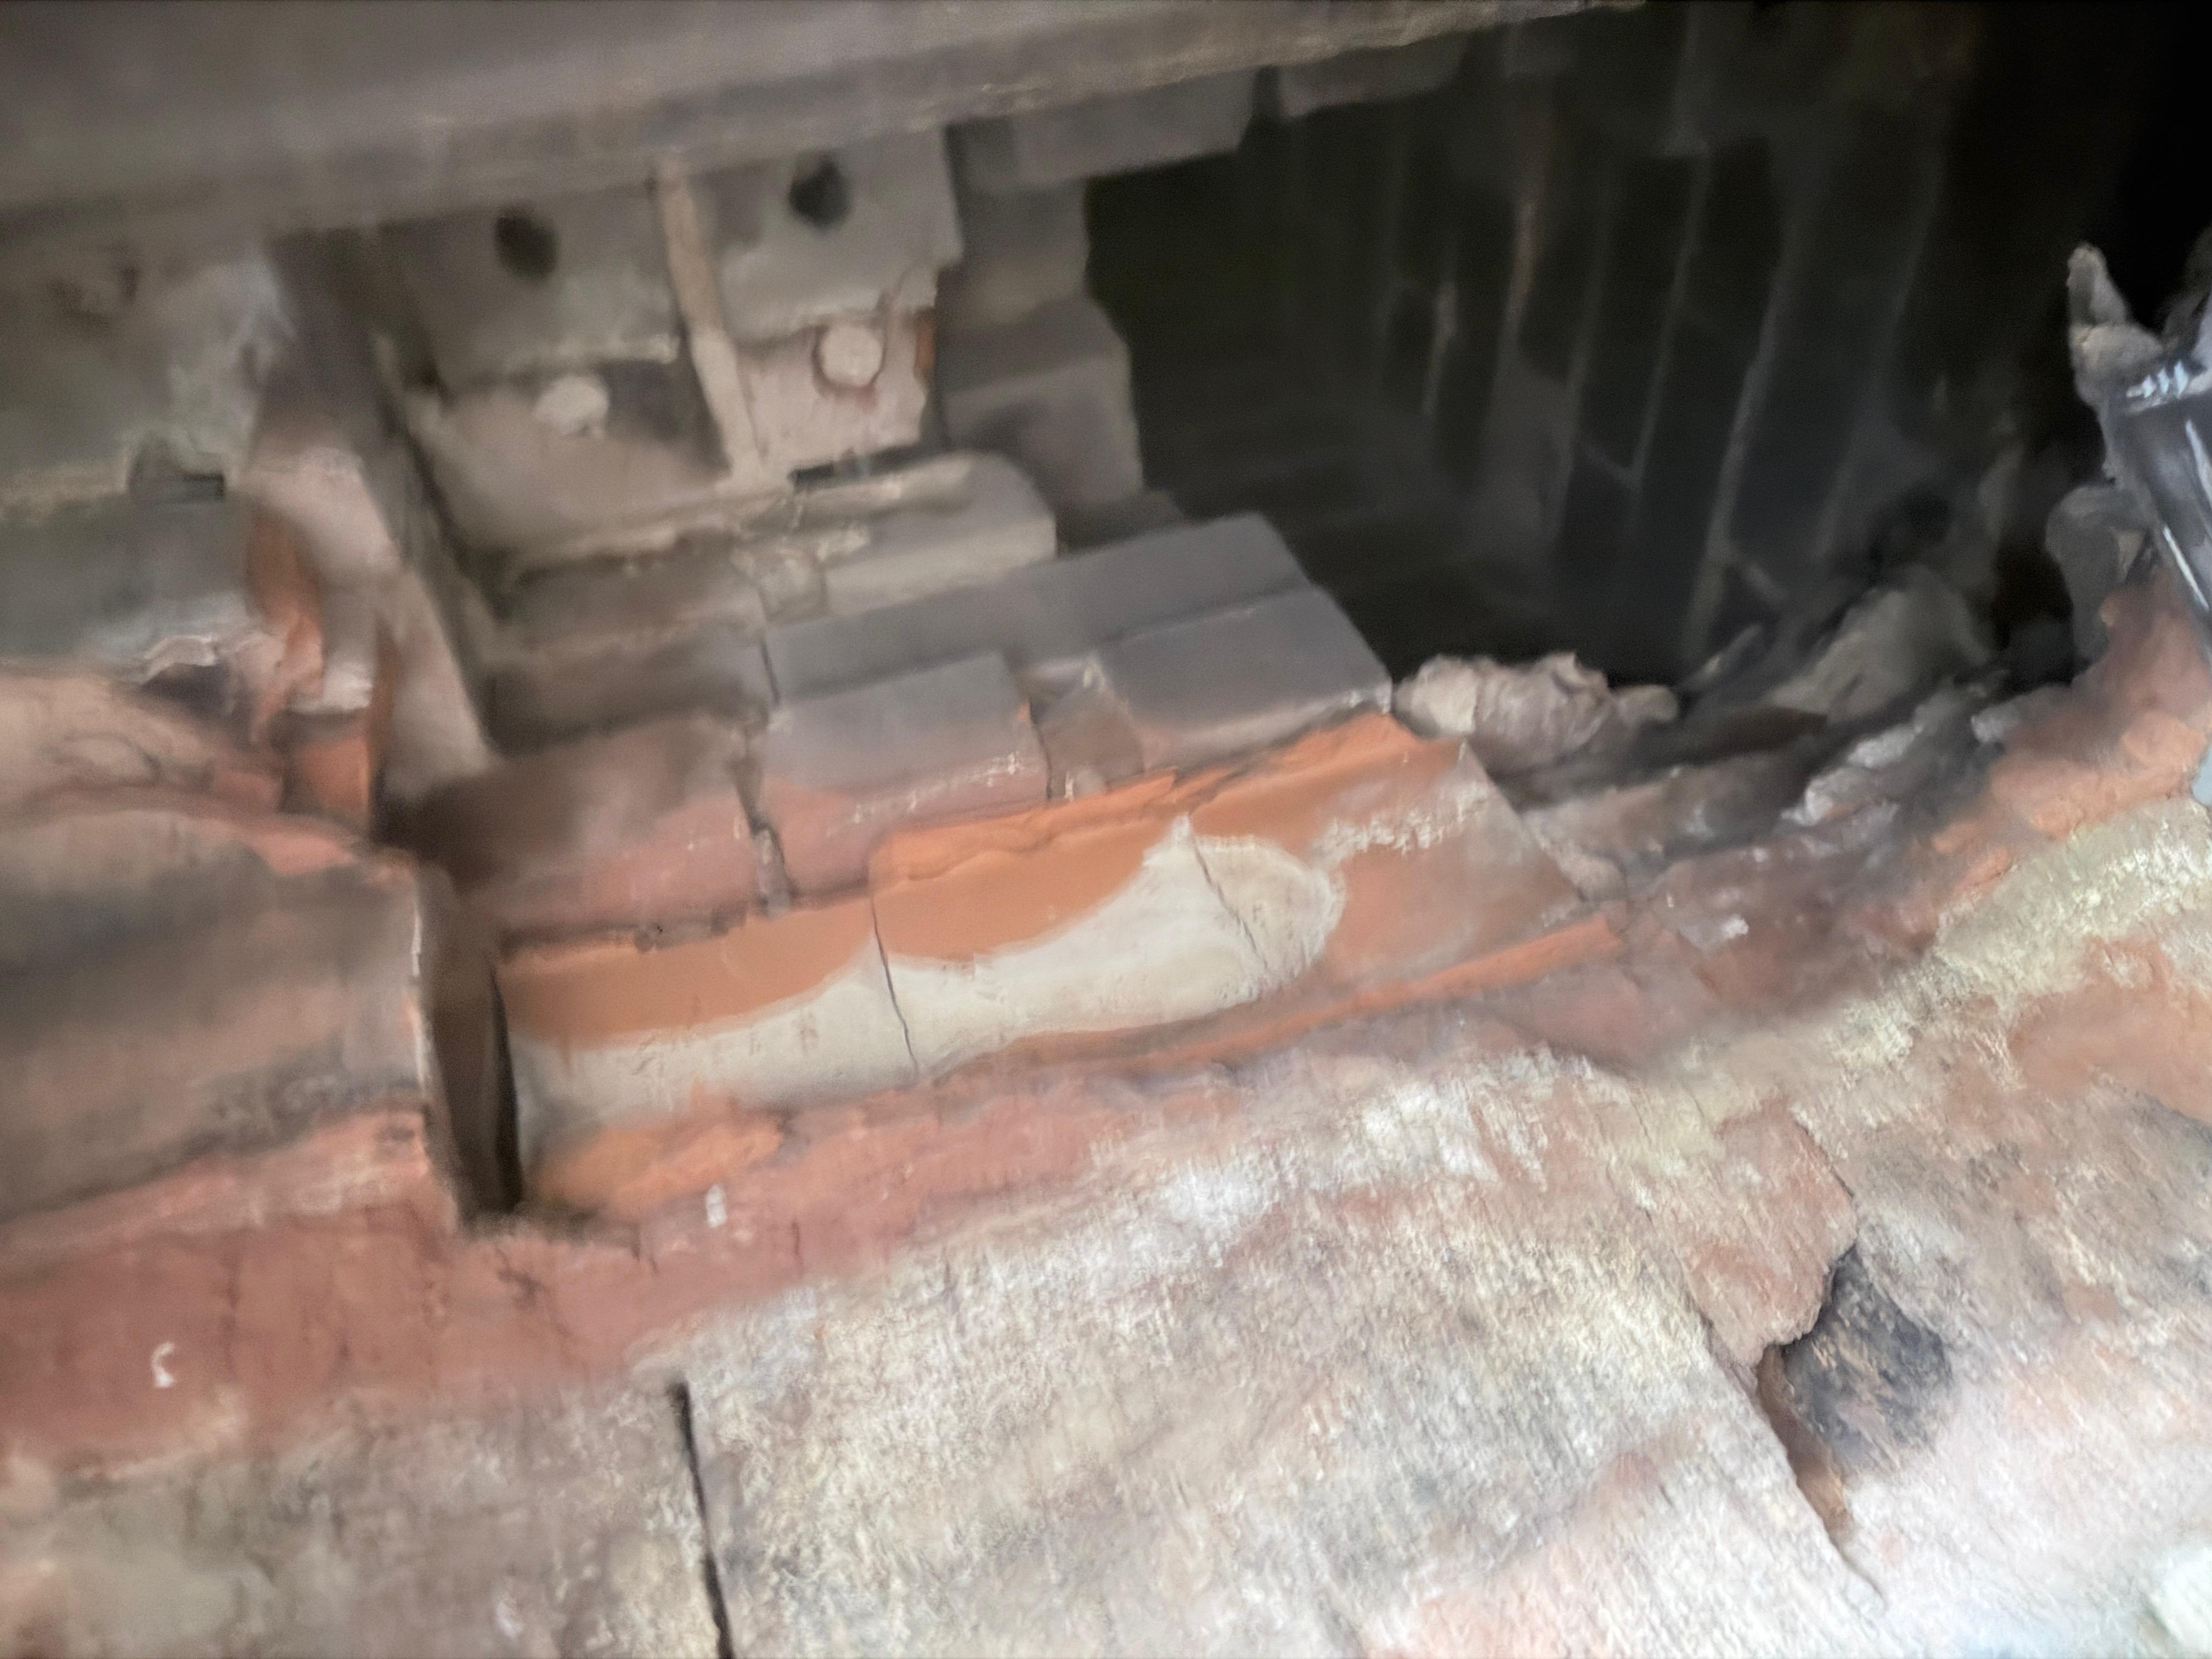
Smoothing and sealing the smoke chamber to improve draft efficiency and eliminate hazardous creosote buildup zones.
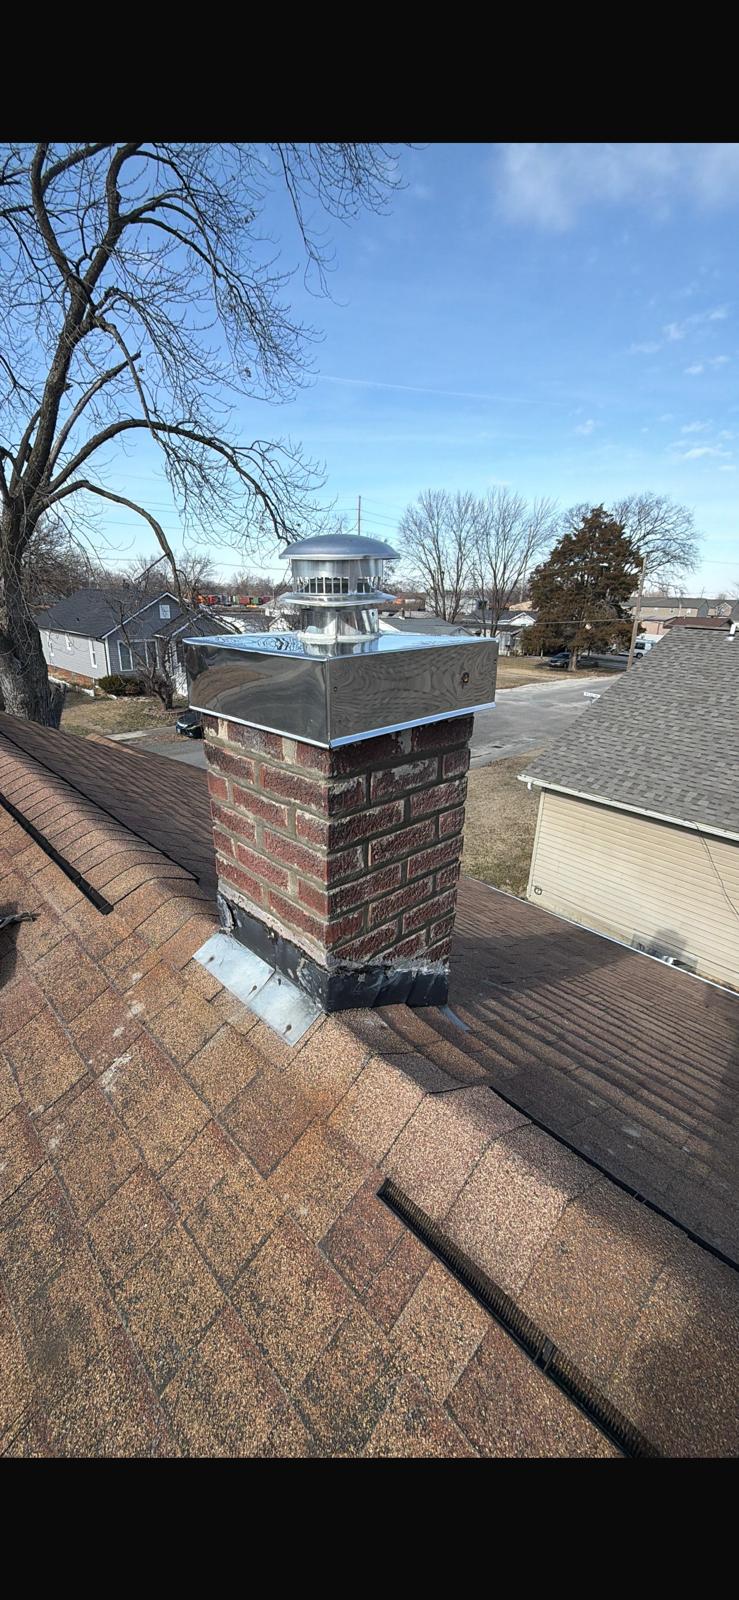
Tearing down compromised brickwork and executing a perfect, structurally sound masonry rebuild from the roofline up.
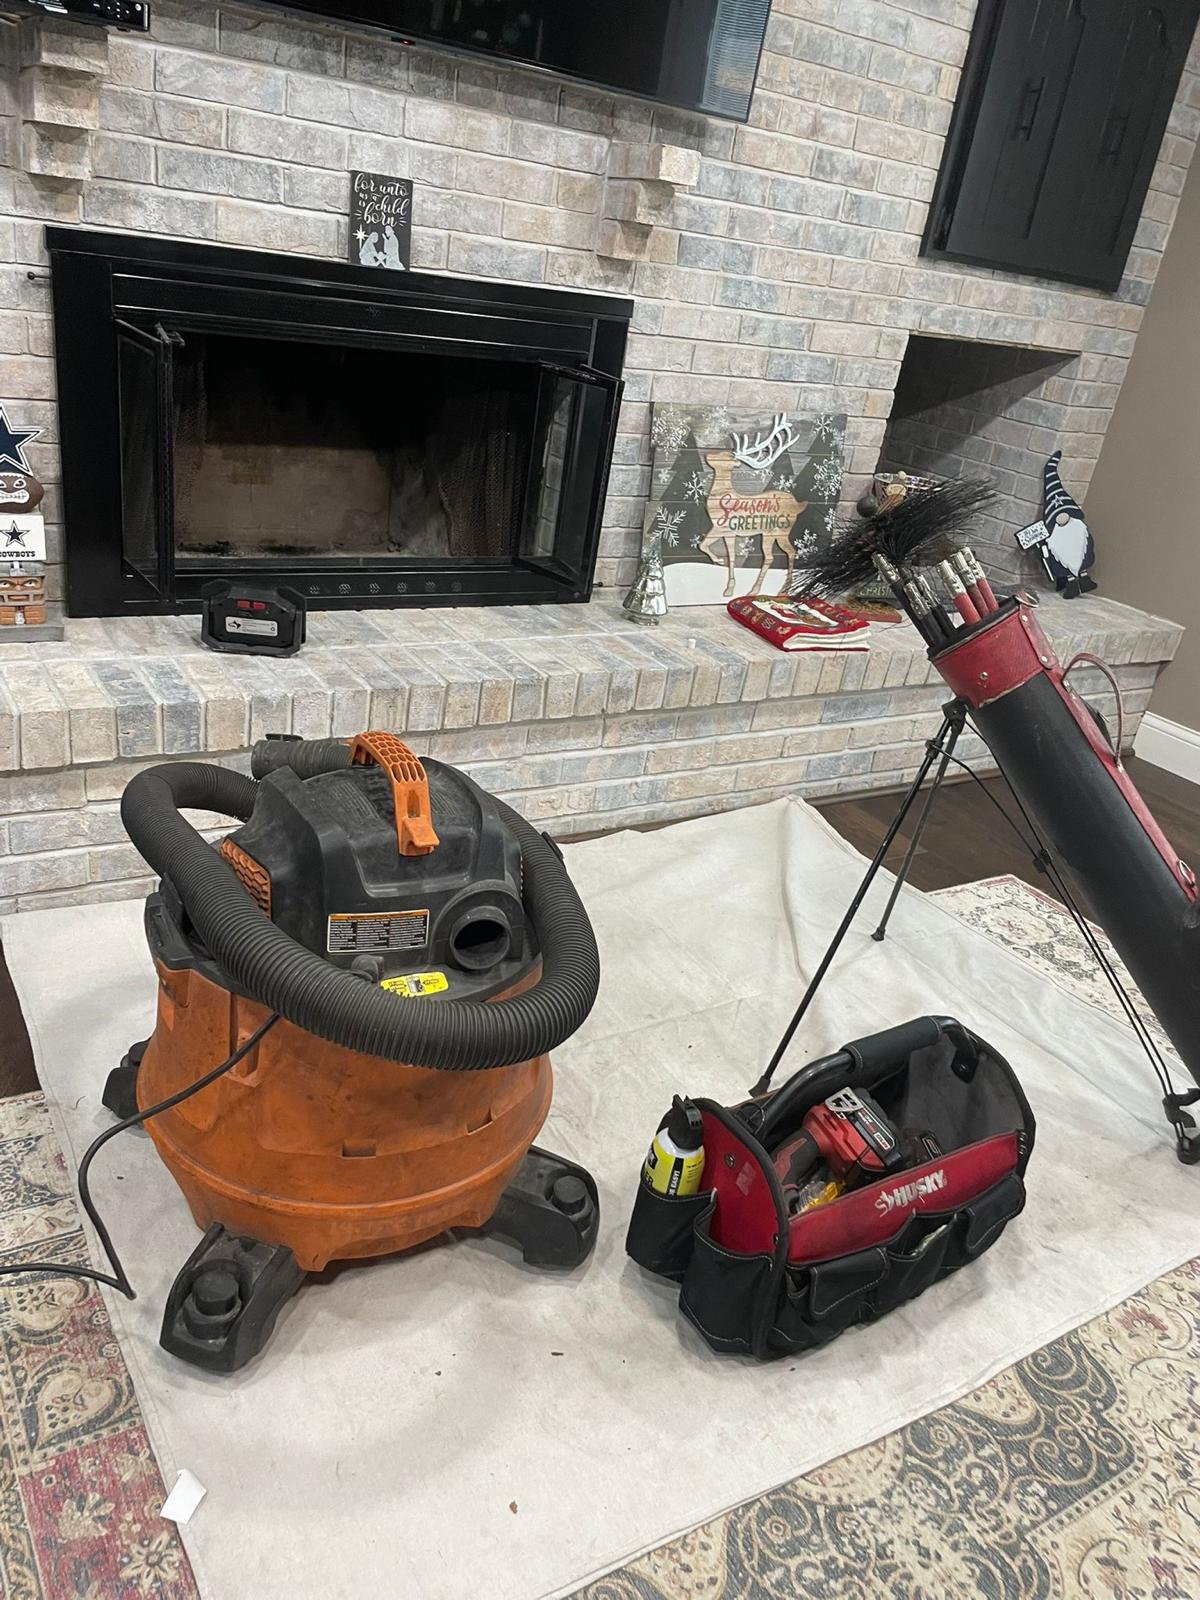
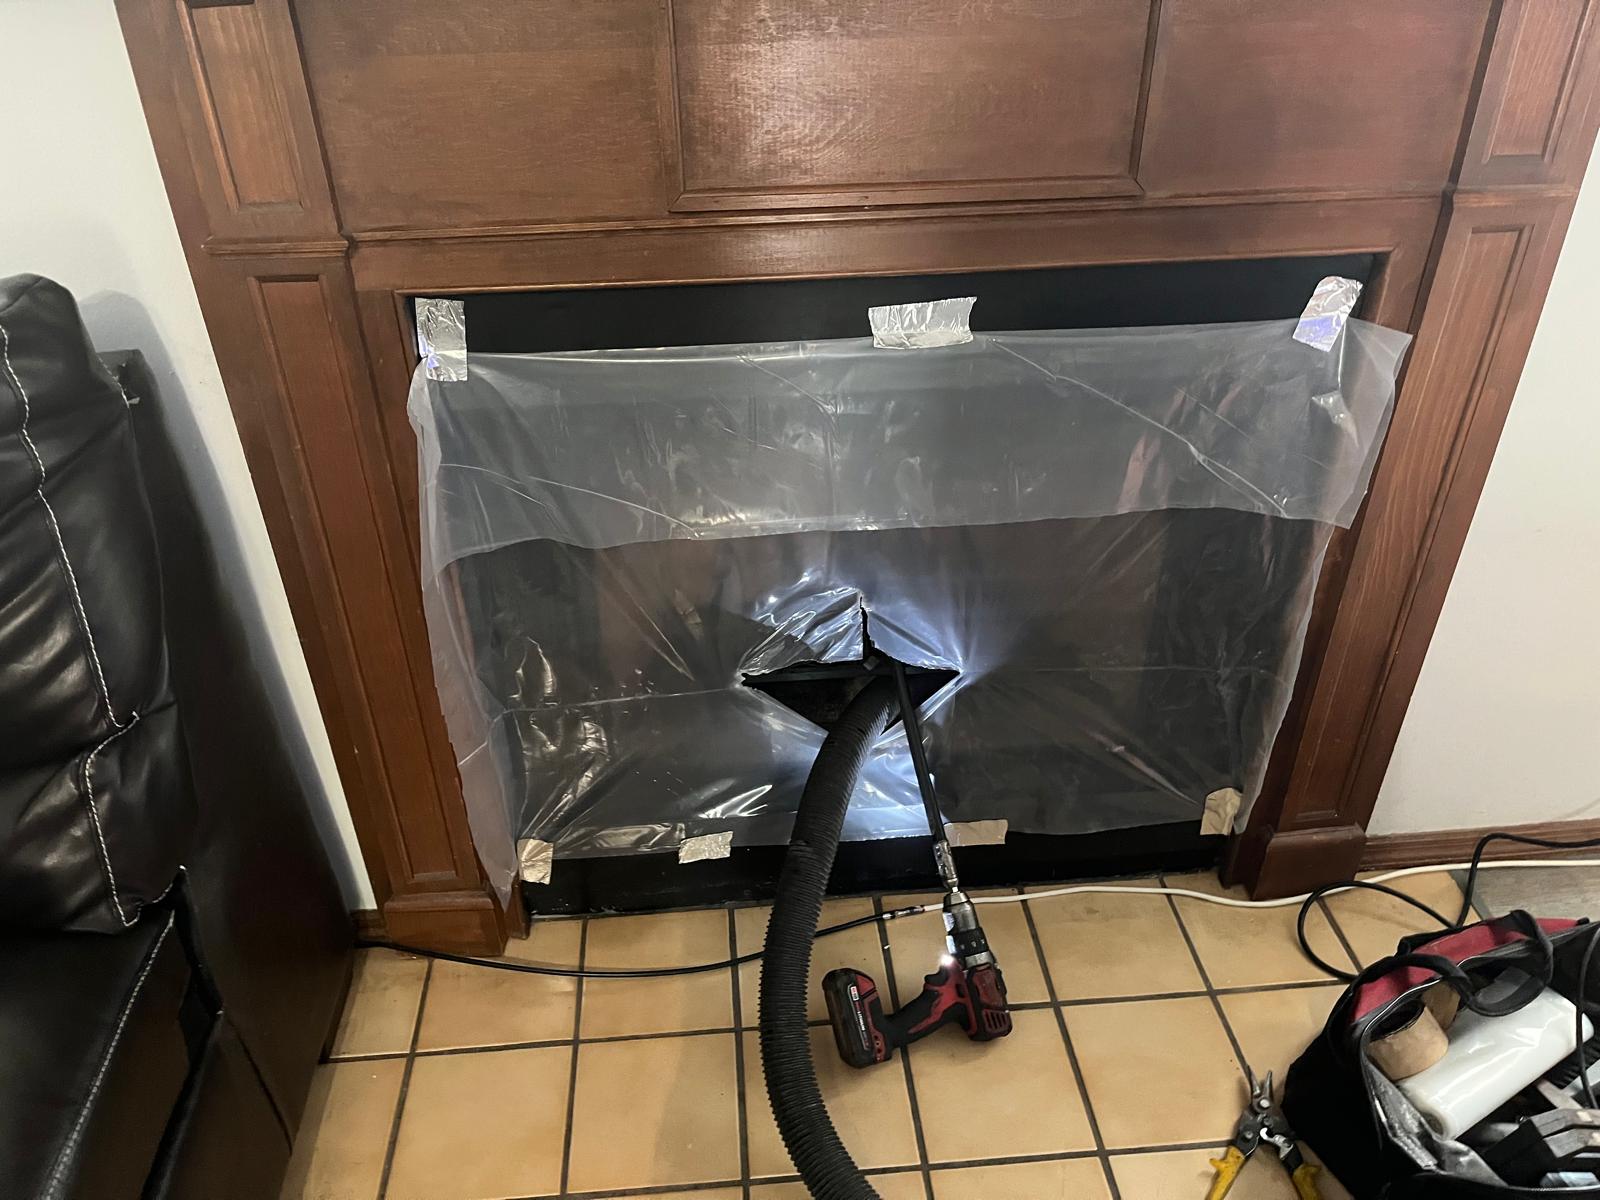
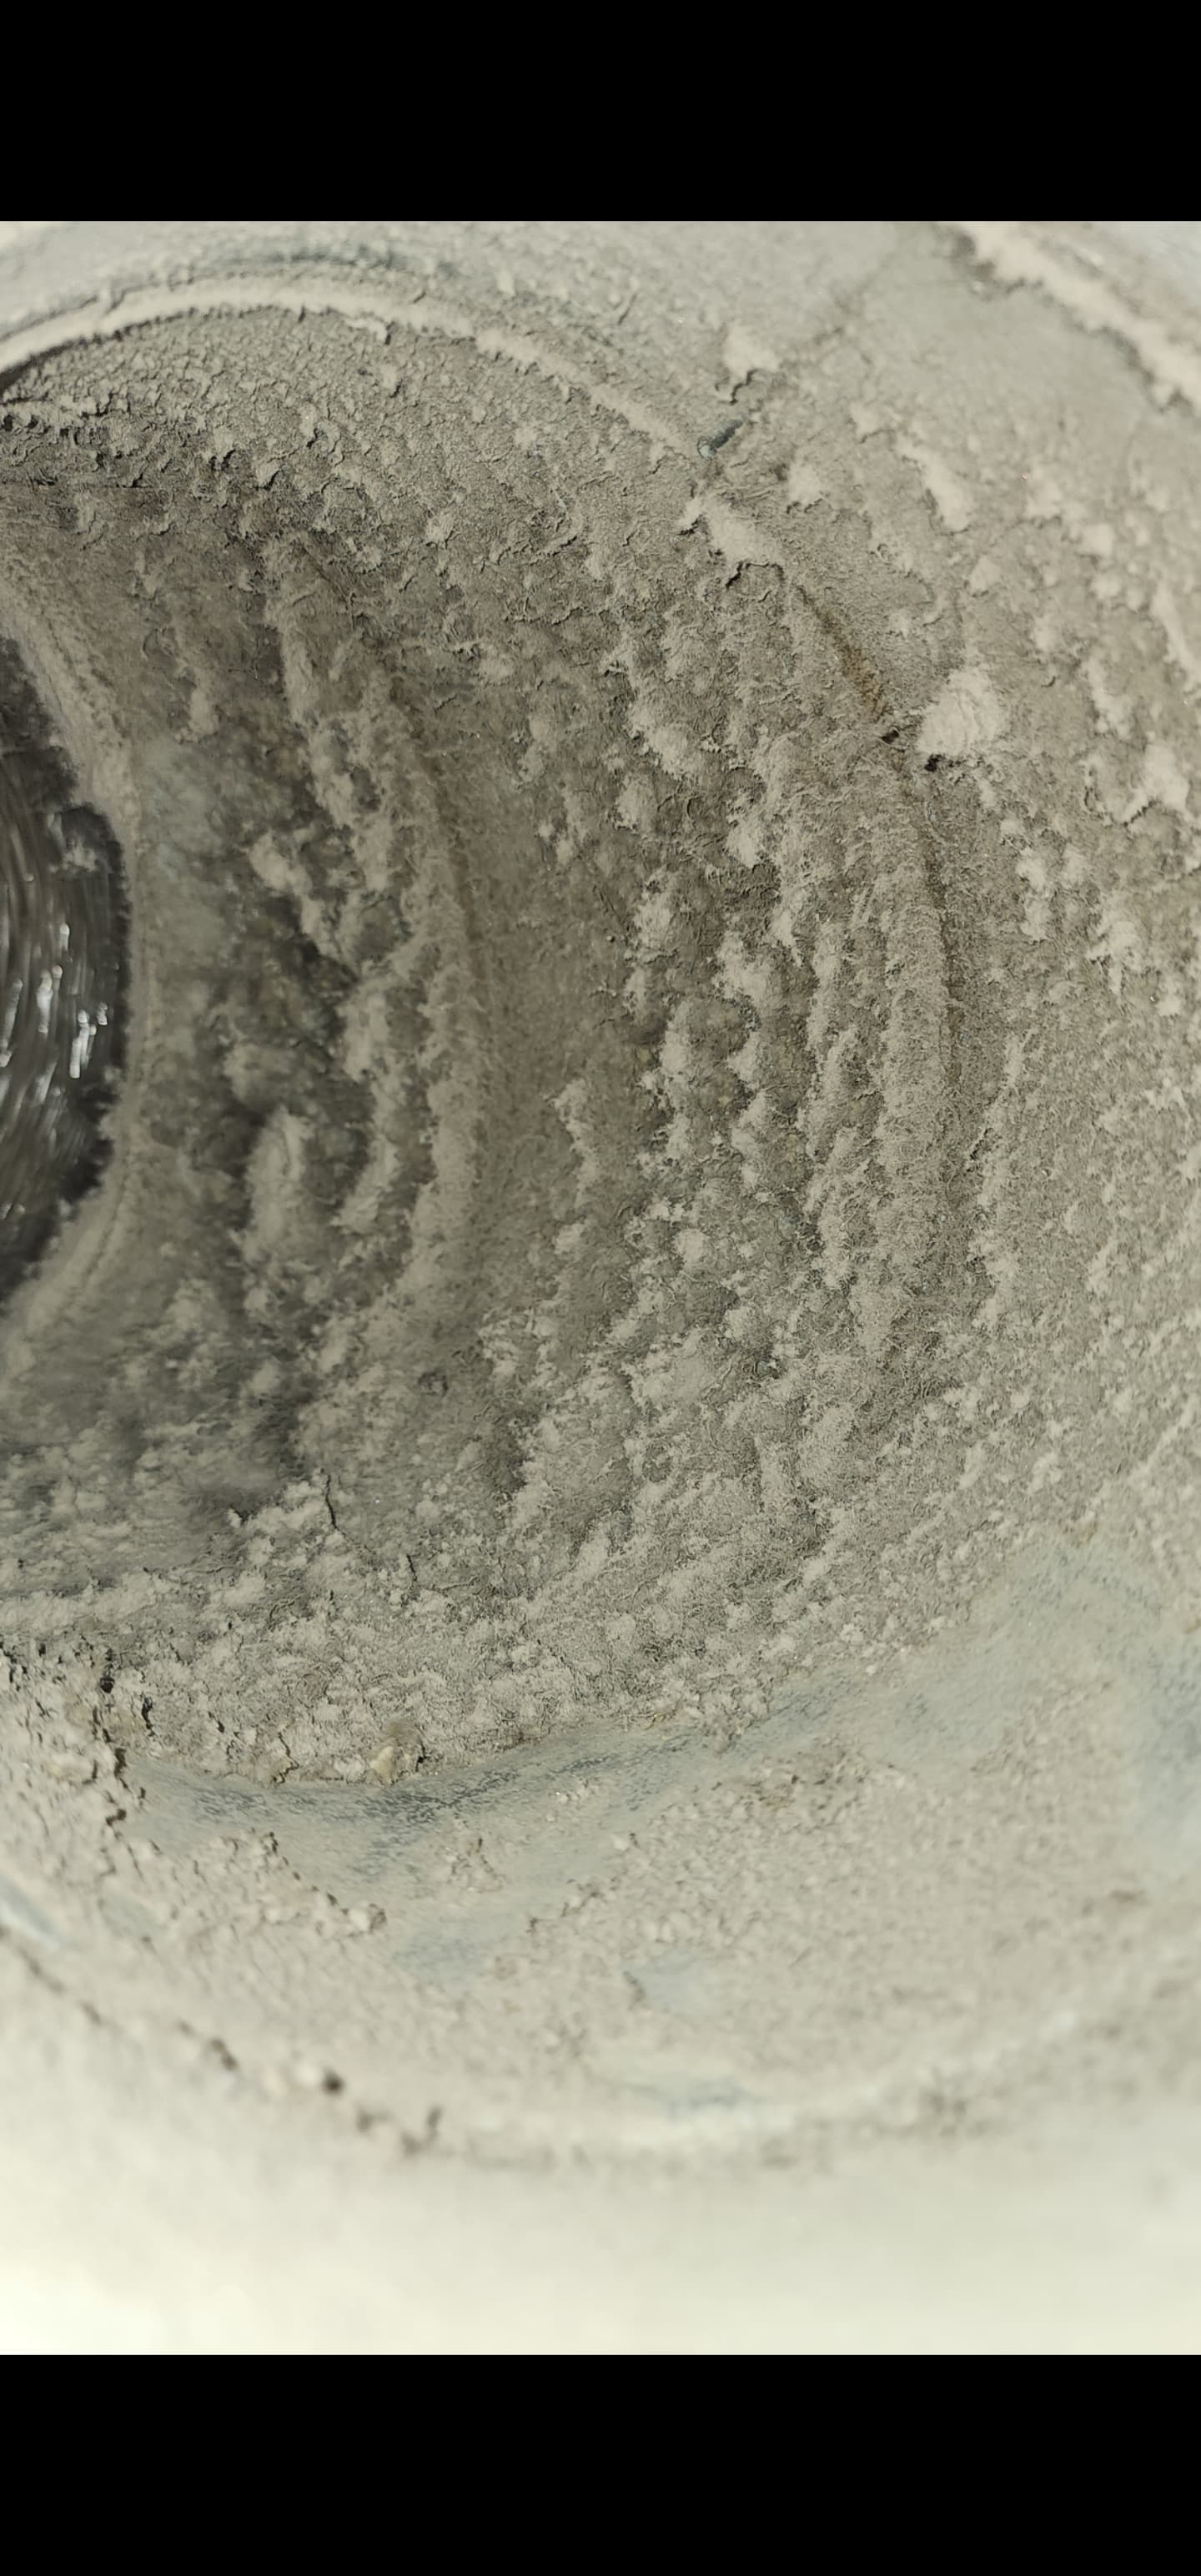
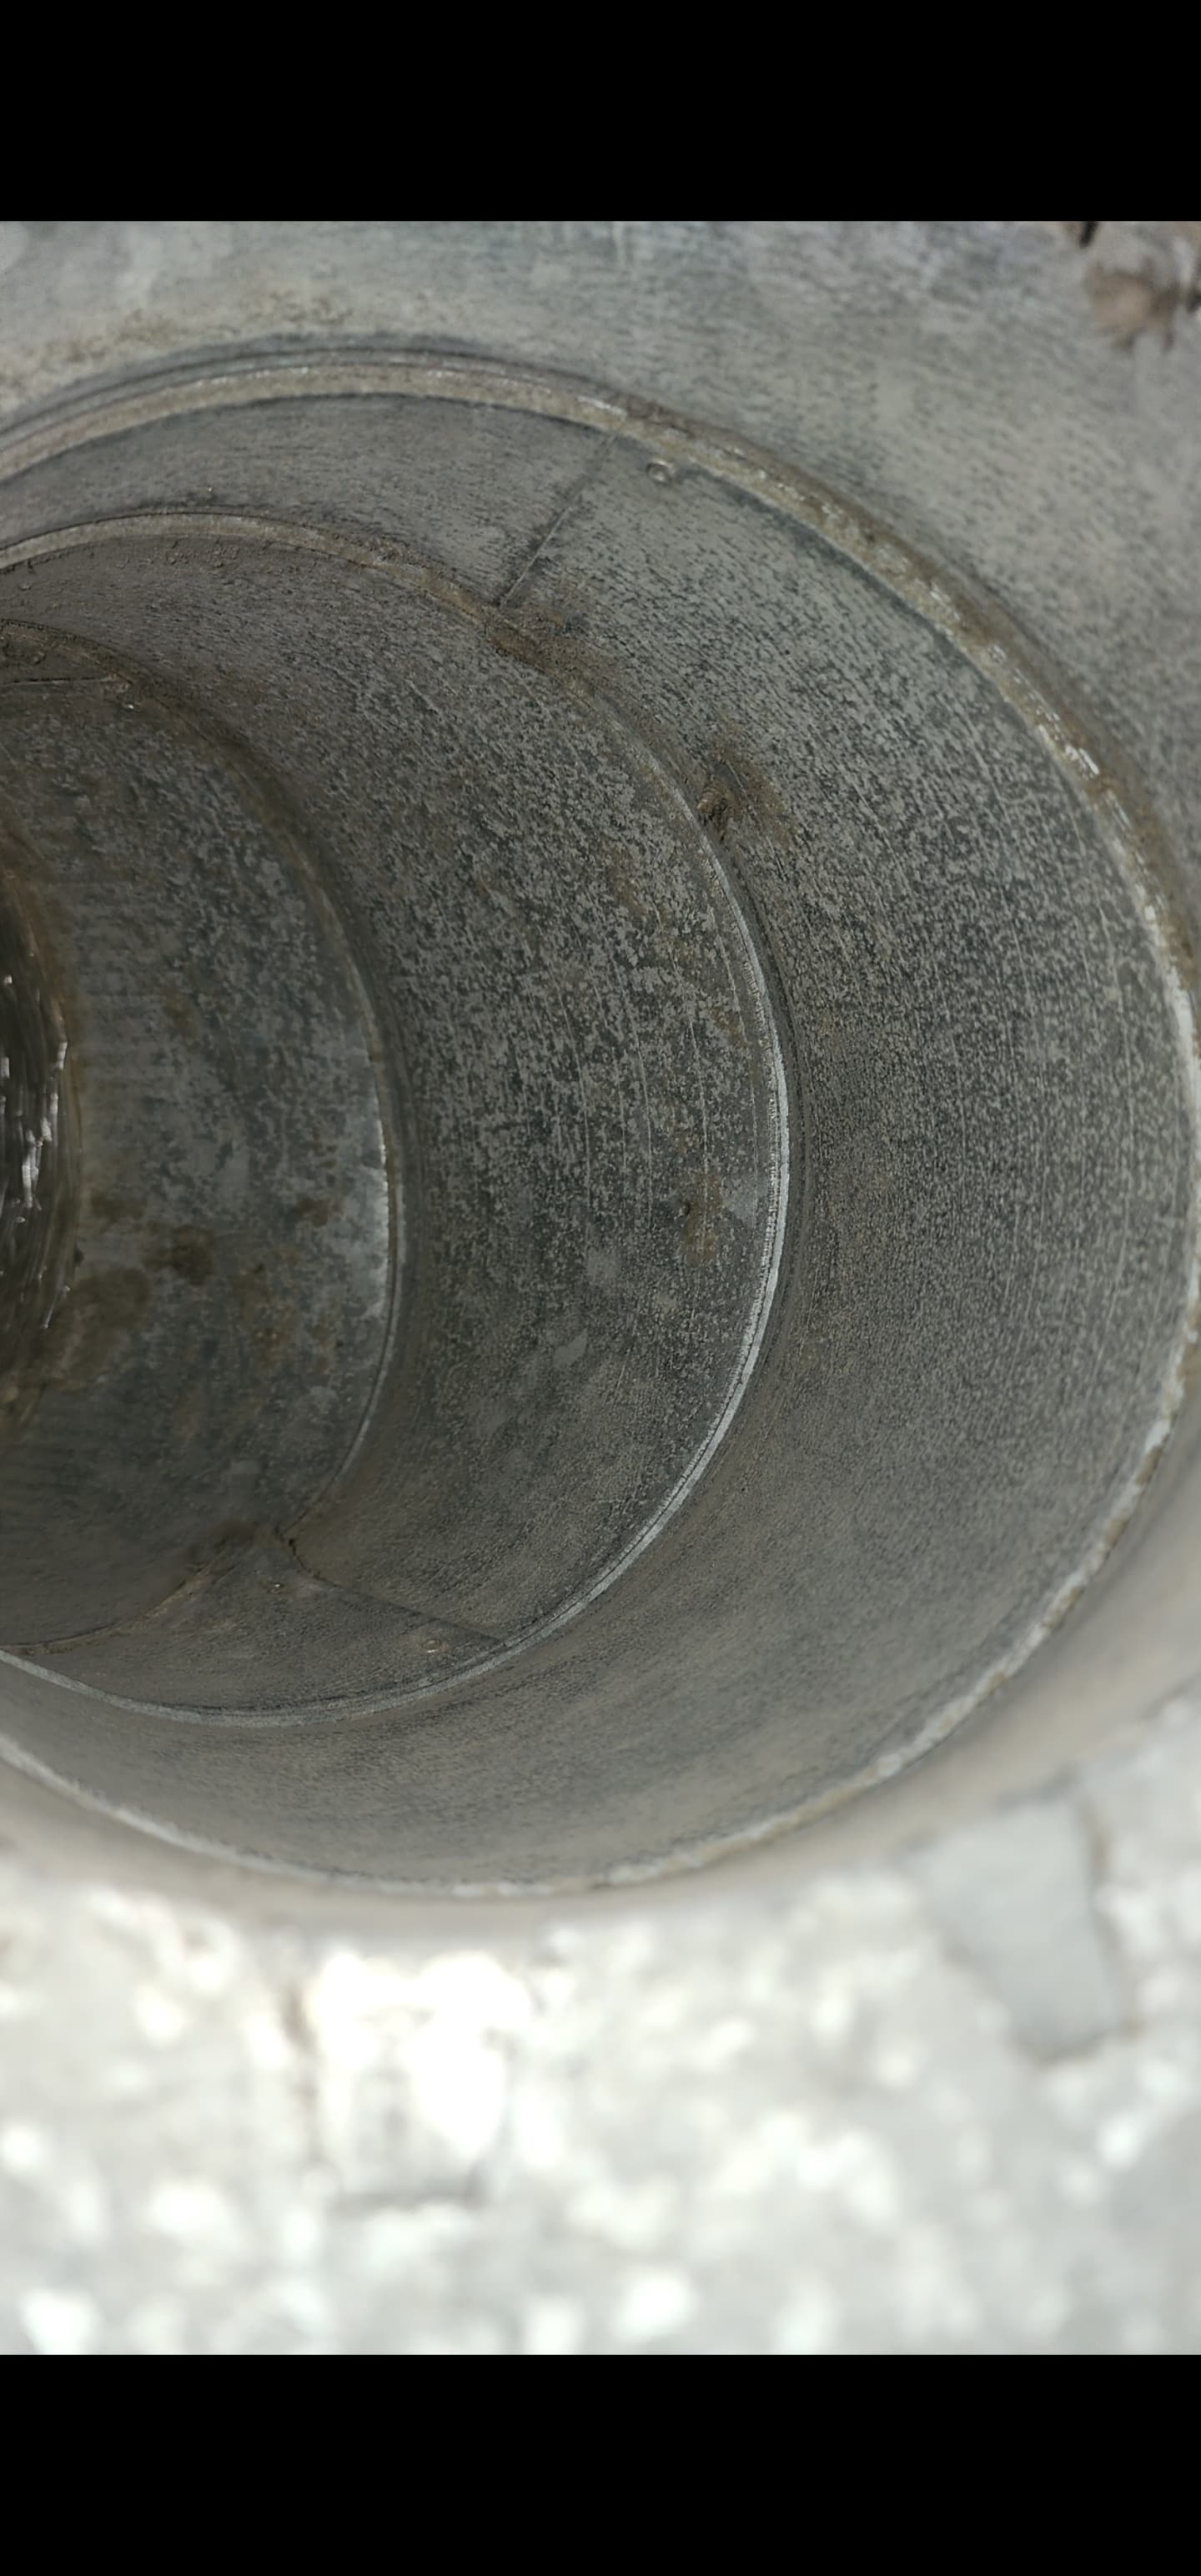
NCSG-certified chimney sweep using commercial HEPA equipment. Complete creosote removal from flue, firebox, smoke chamber, and smoke shelf — zero dust in your home.
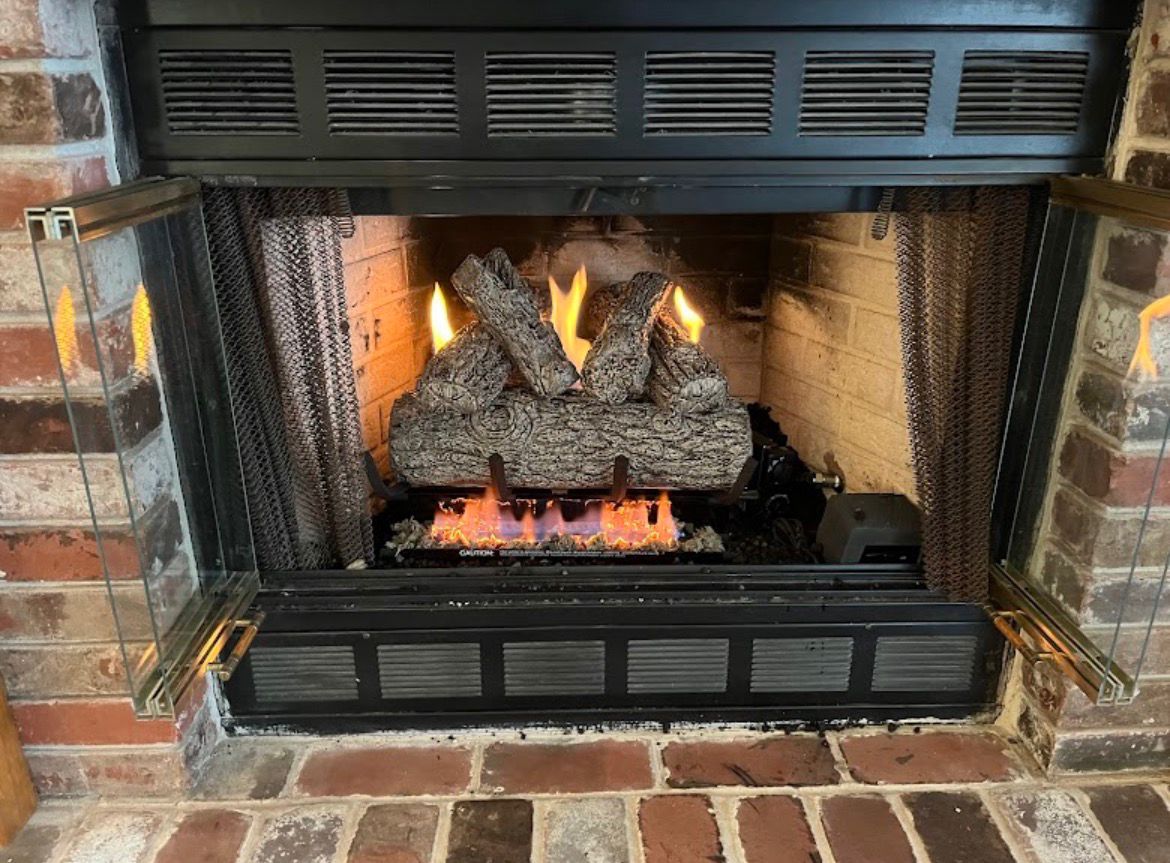
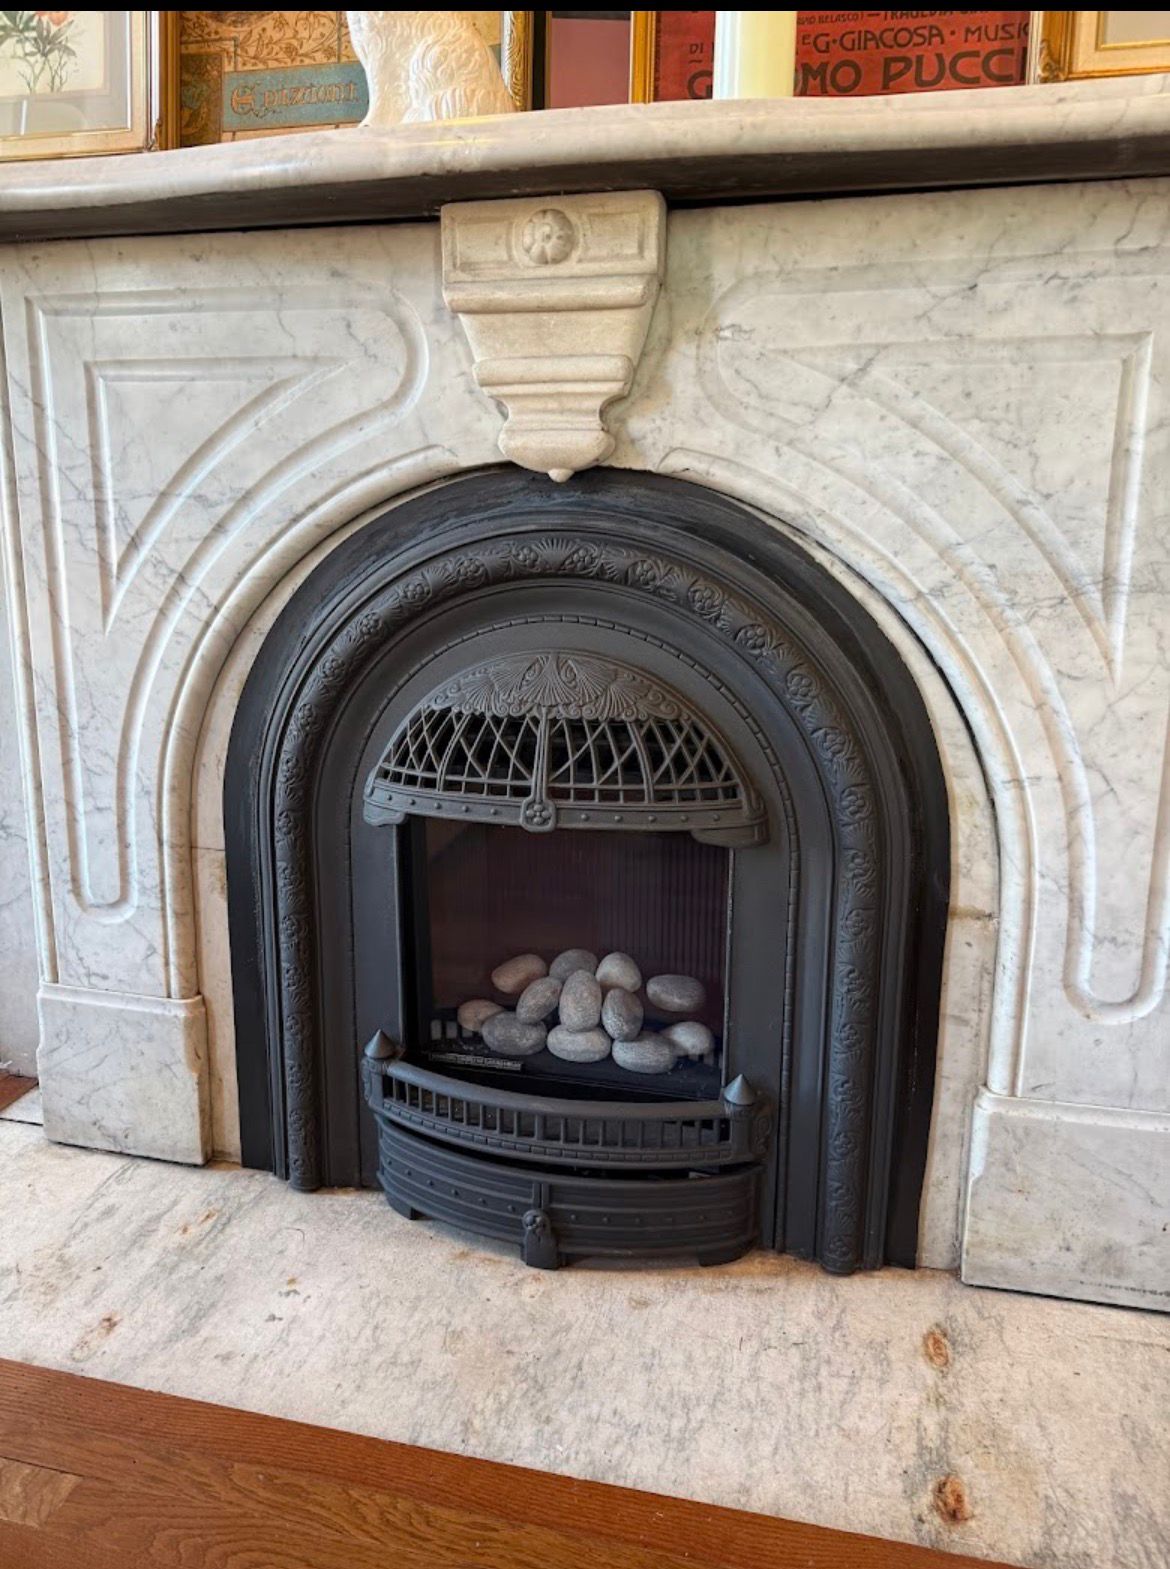
Annual gas fireplace inspection and cleaning — burner ports, pilot assembly, gas valve test, and CO safety check. Keeps your gas appliance safe and efficient all season.
follows NADCA standards whole-home HEPA duct cleaning. Before-and-after camera documentation. EPA recognized as a core indoor air quality practice in 2025.
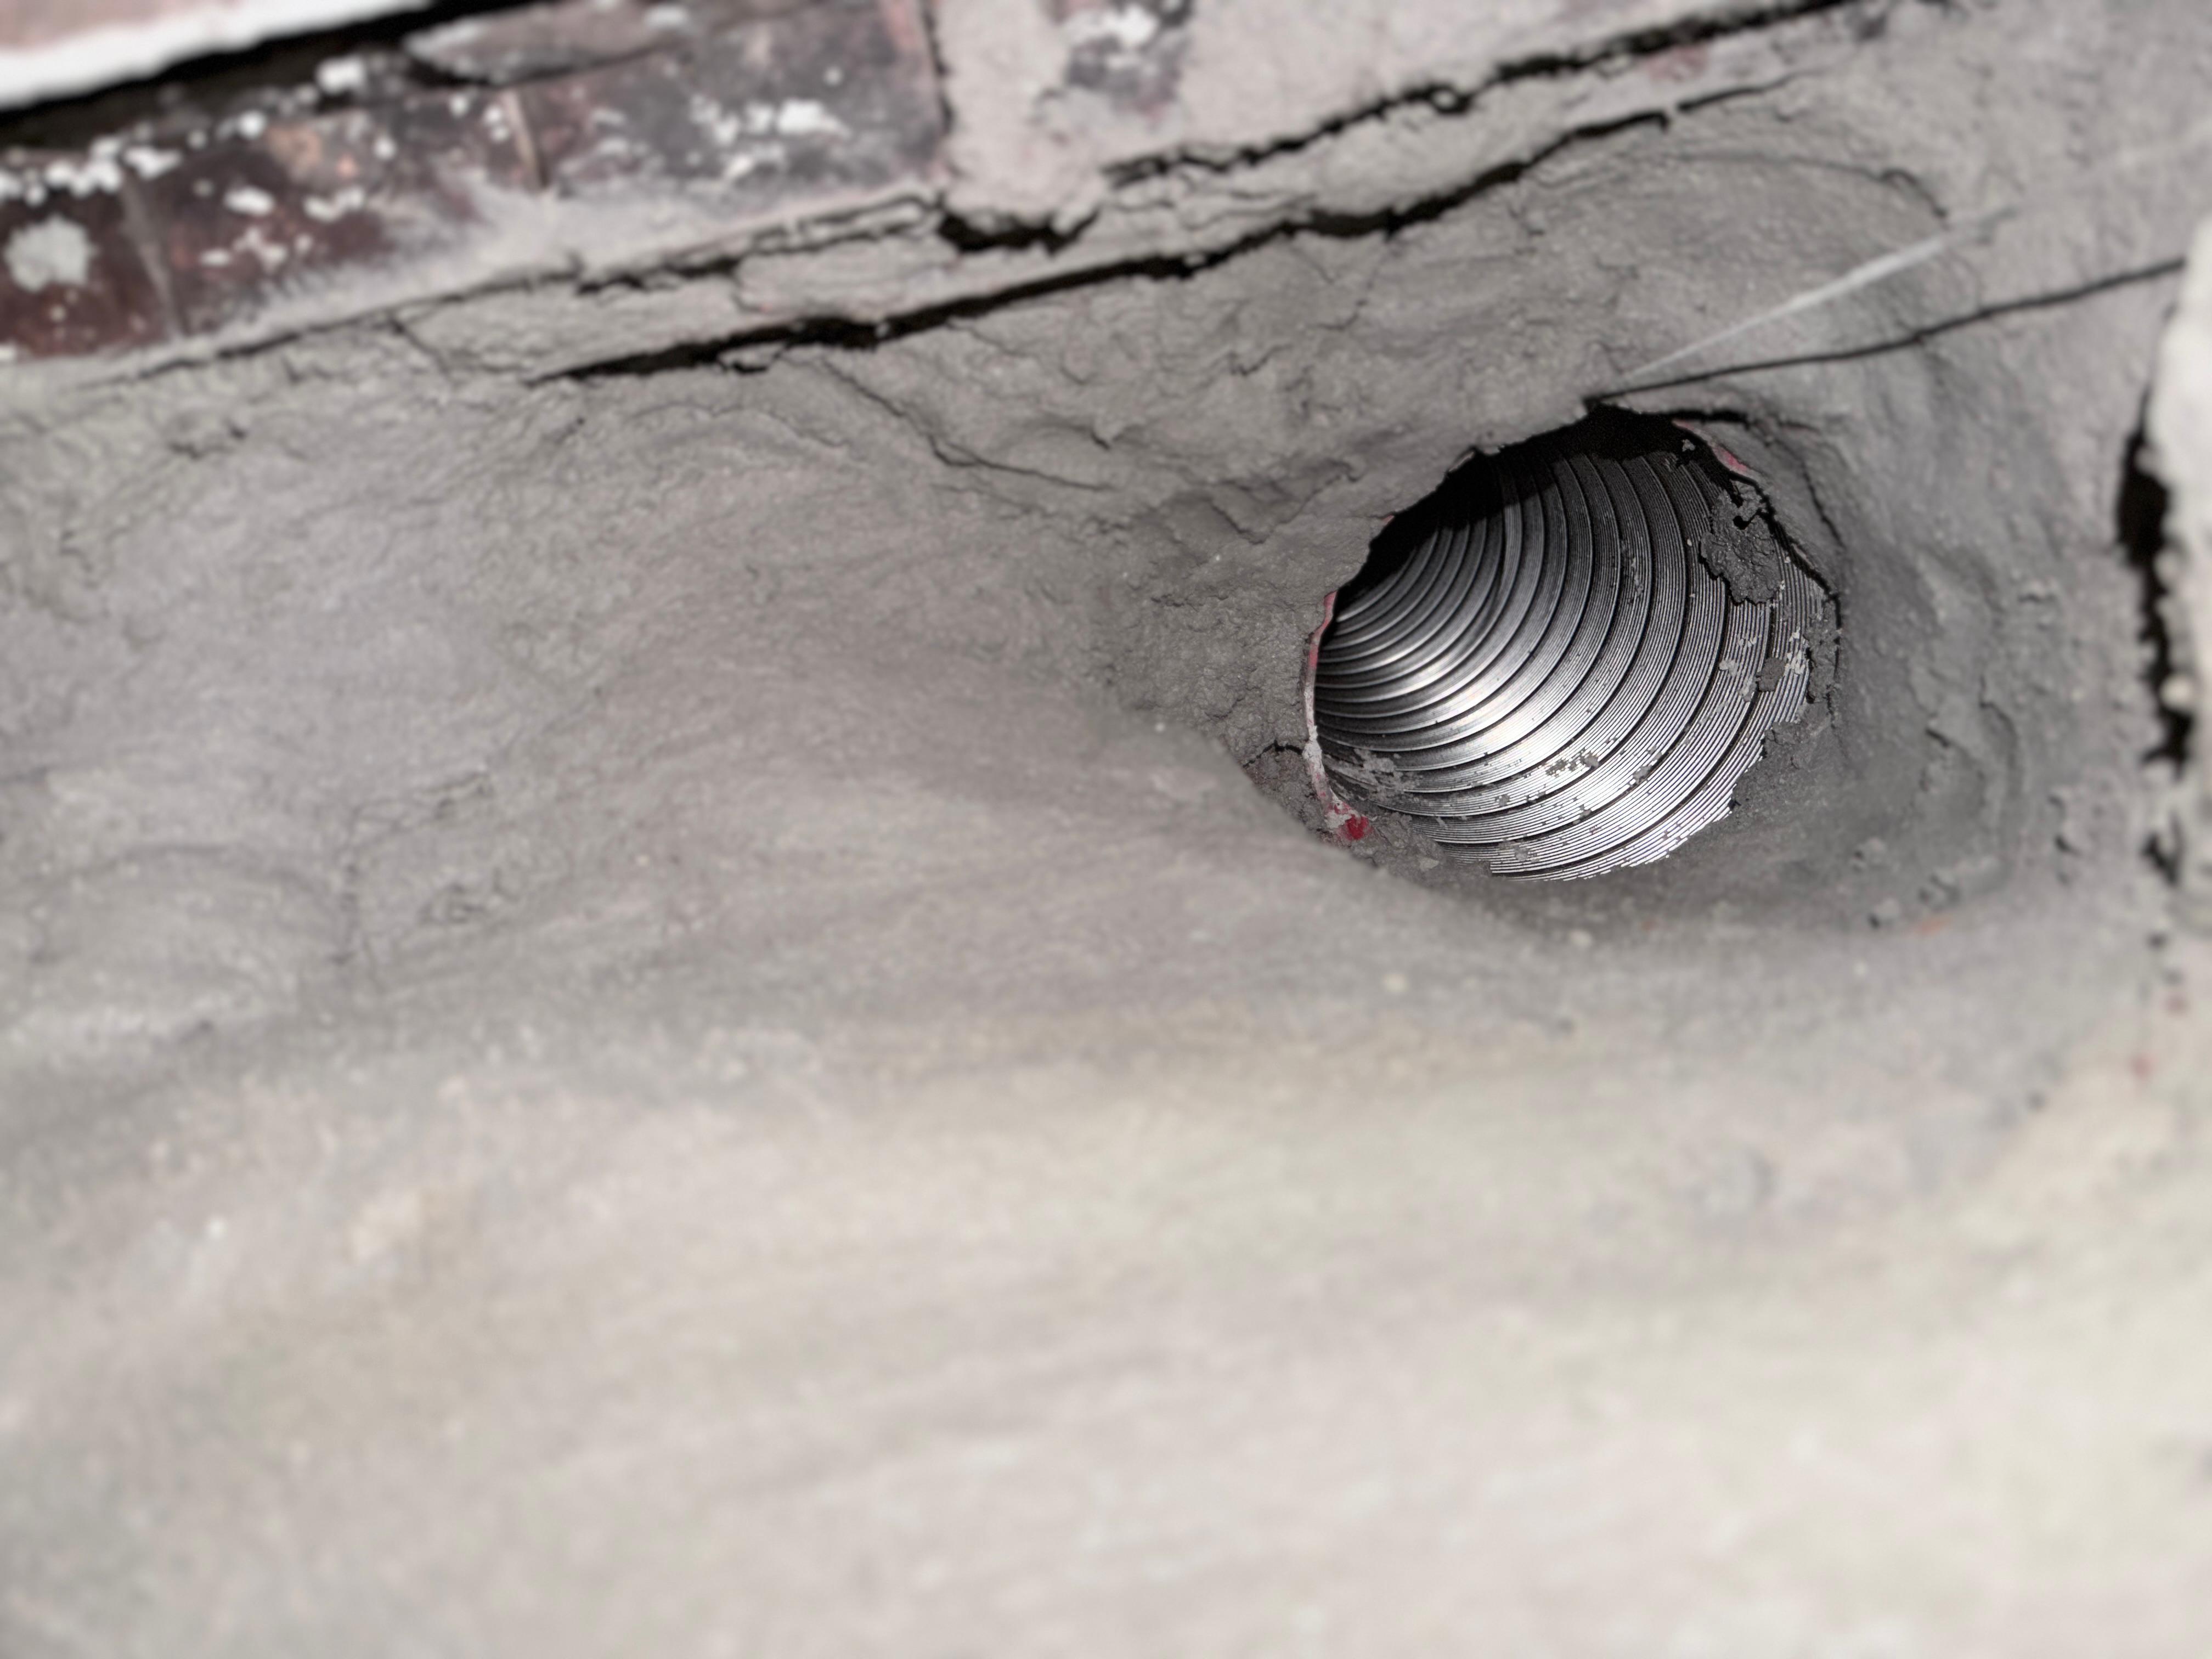
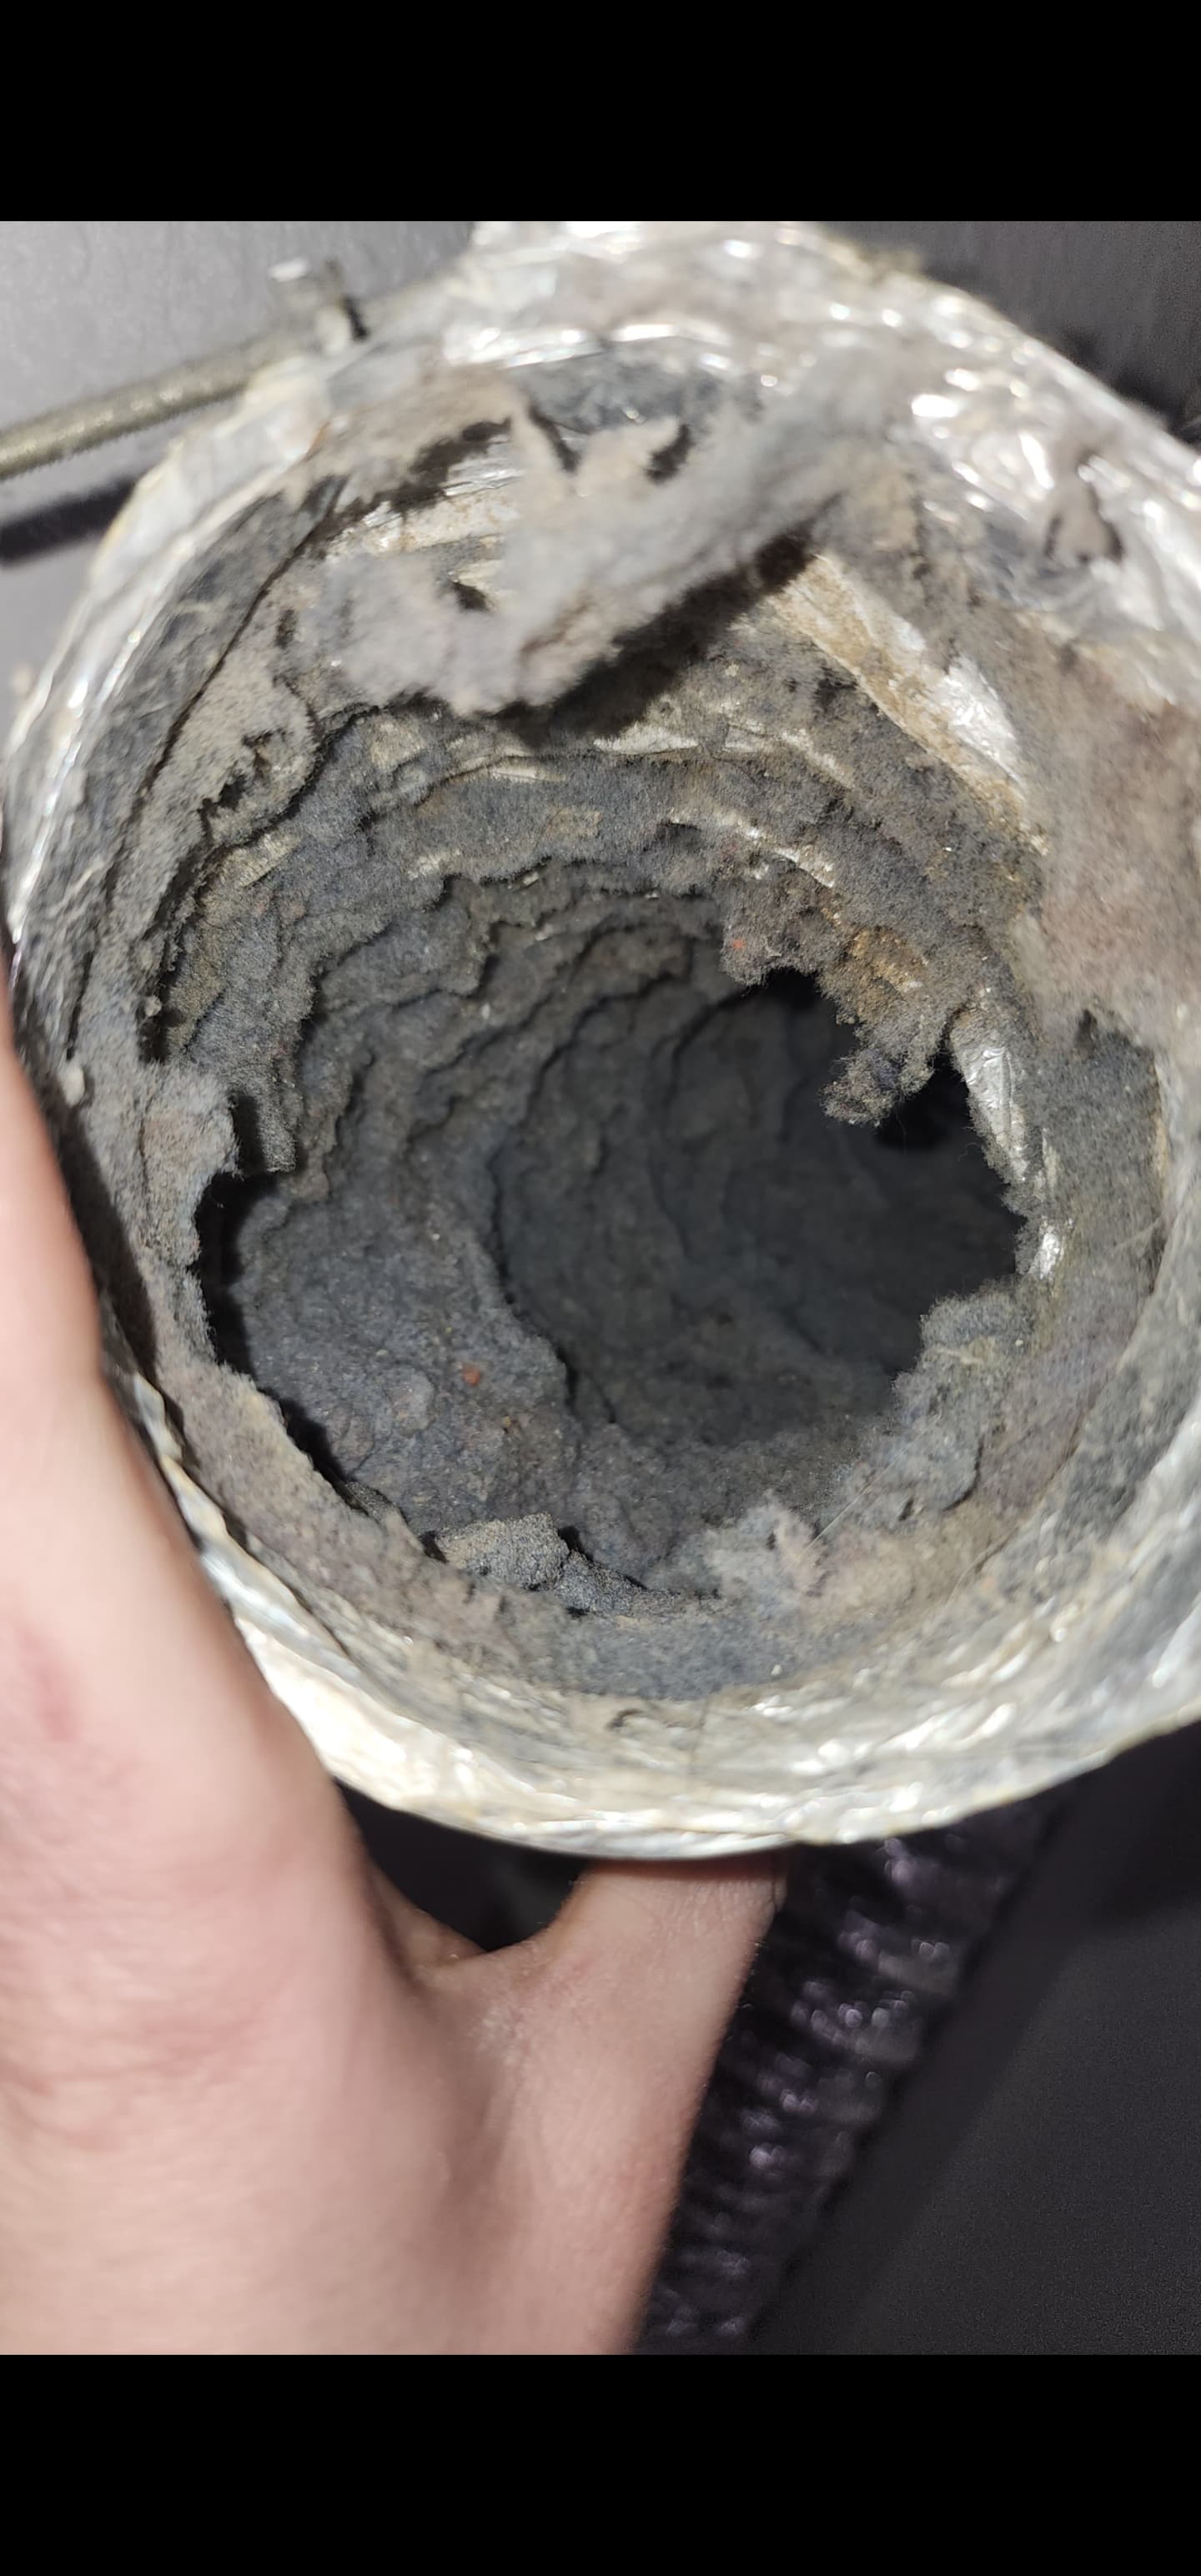
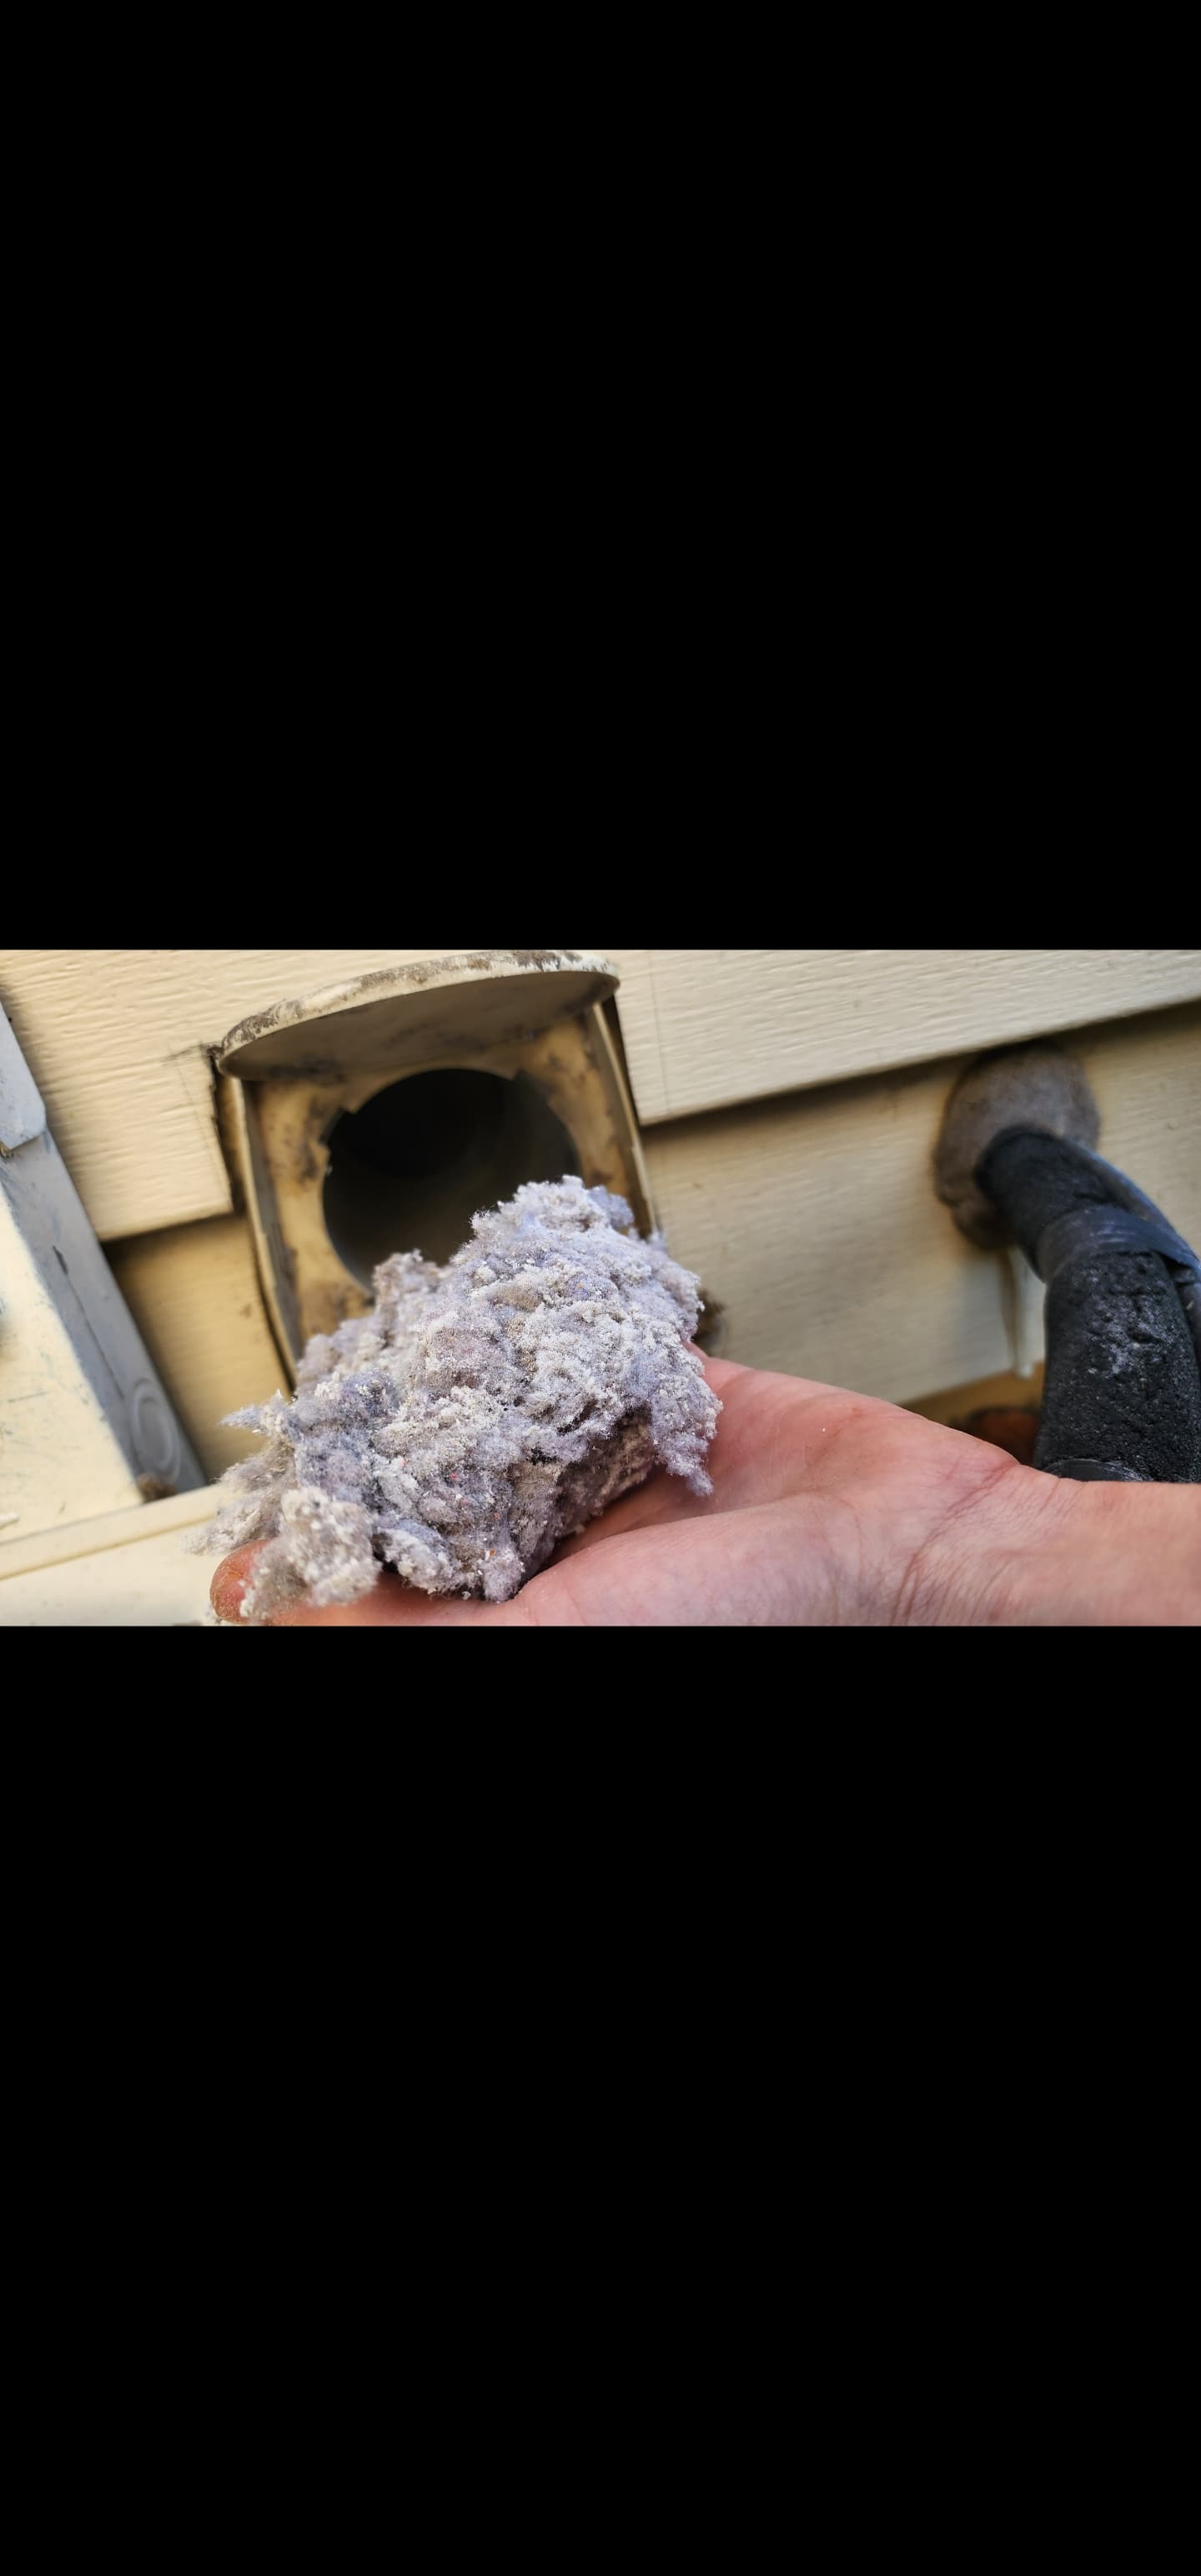
Full dryer vent line cleaning from appliance to exterior. Lint extraction, airflow test, and flex duct replacement if needed. NFPA: 34% of dryer fires are caused by failure to clean.
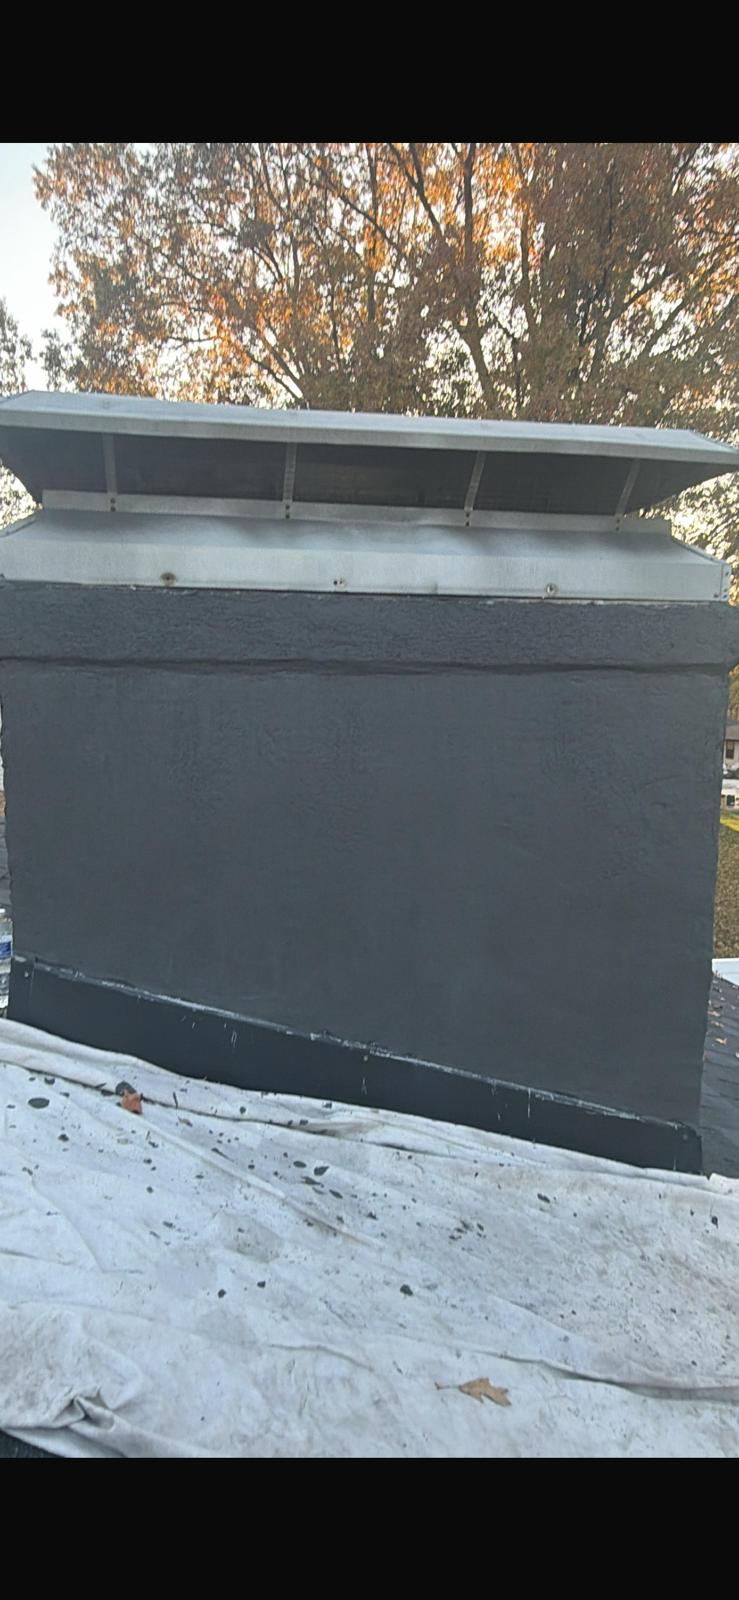
Professional vapor-permeable waterproof sealant system applied to a deteriorating chimney. The sealant blocks rain from entering the masonry while allowing trapped moisture to escape — preventing the freeze-thaw spalling that destroys unprotected brick over Missouri winters. 10-year protection guarantee included.
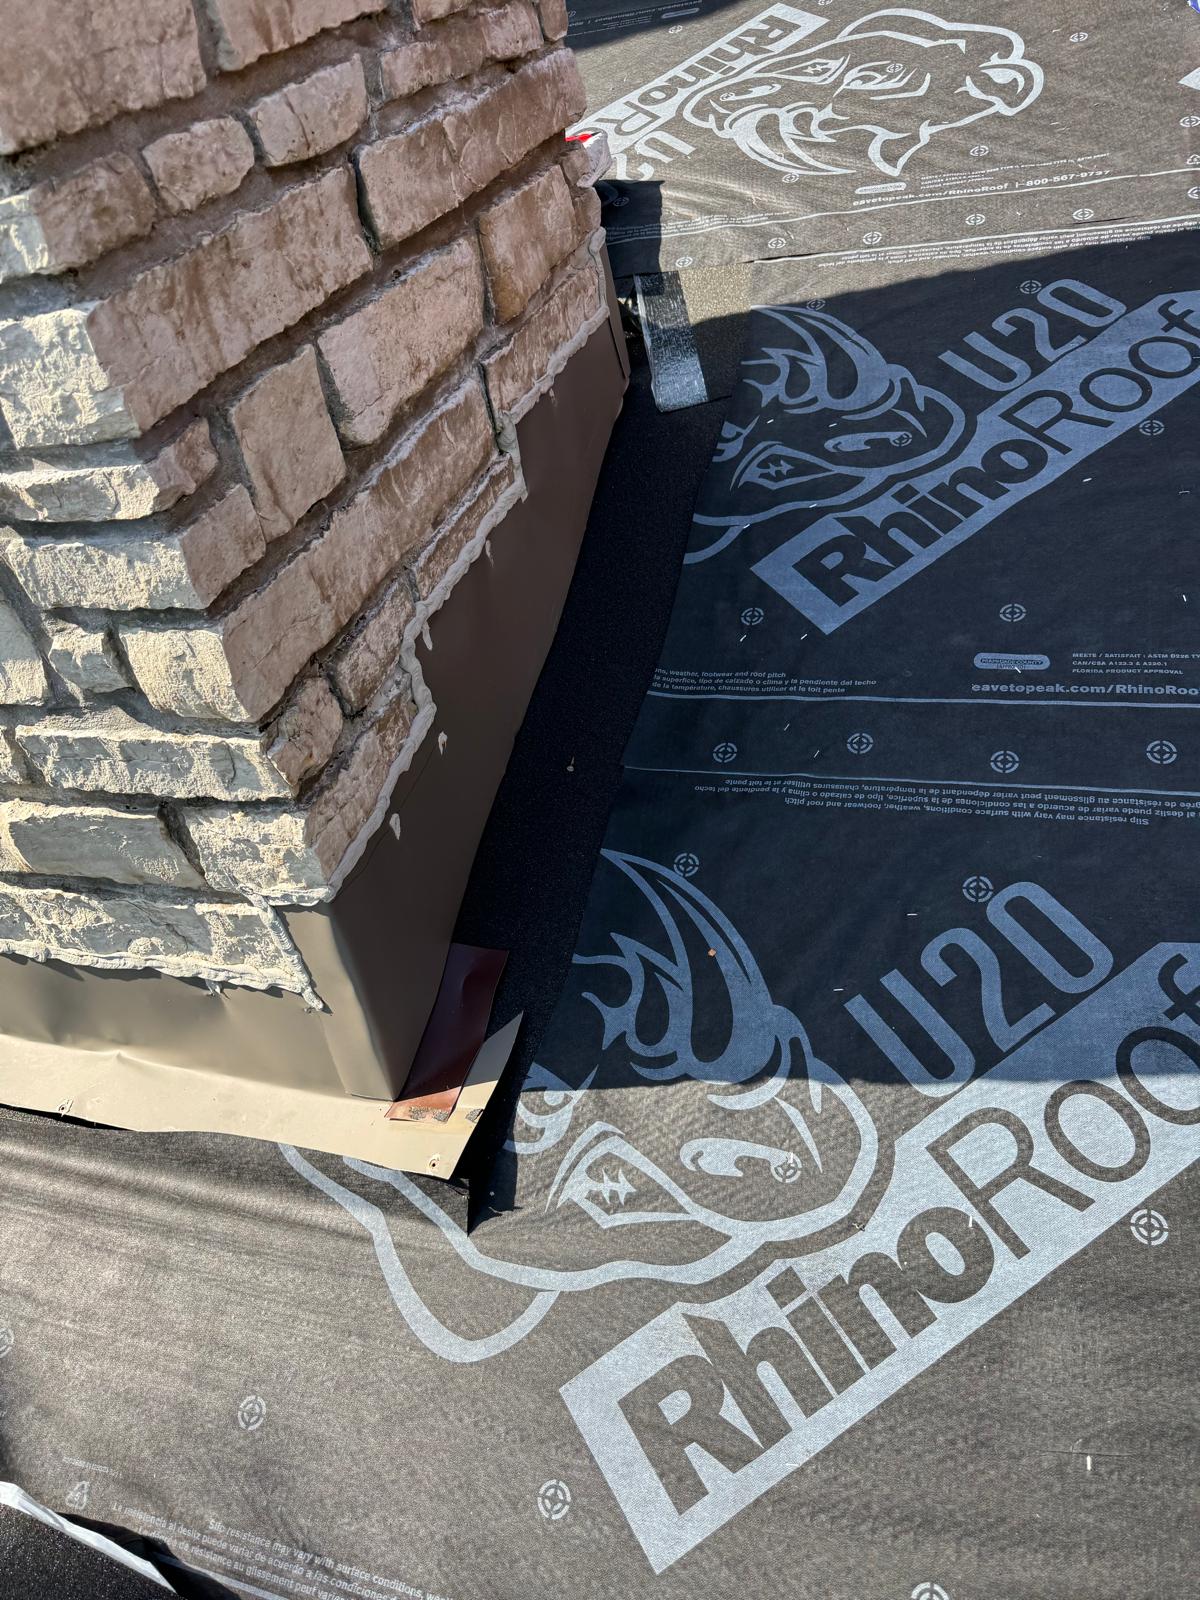
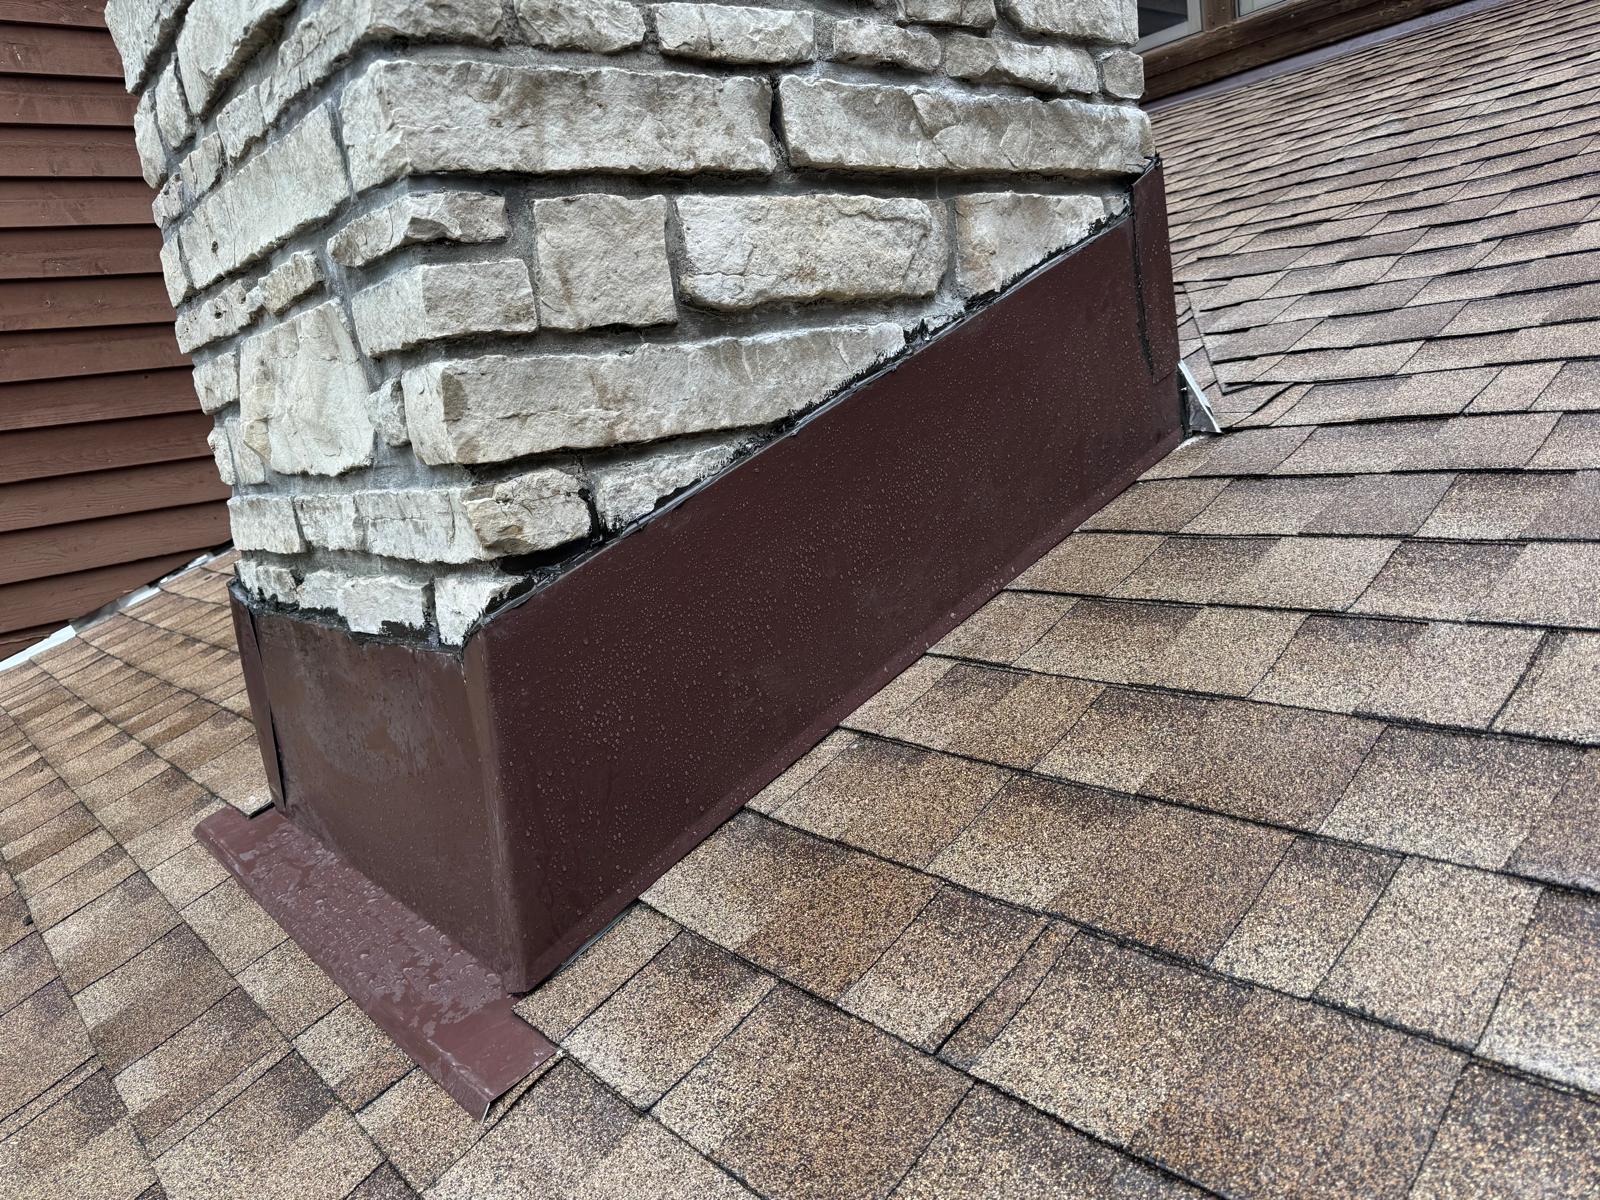
Complete step flashing and counter flashing replacement on a stone chimney. The old flashing had completely separated from the masonry, allowing water to pour into the attic with every rain. RhinoRoof U20 ice-and-water shield applied first, new custom-bent flashing installed and sealed tight.
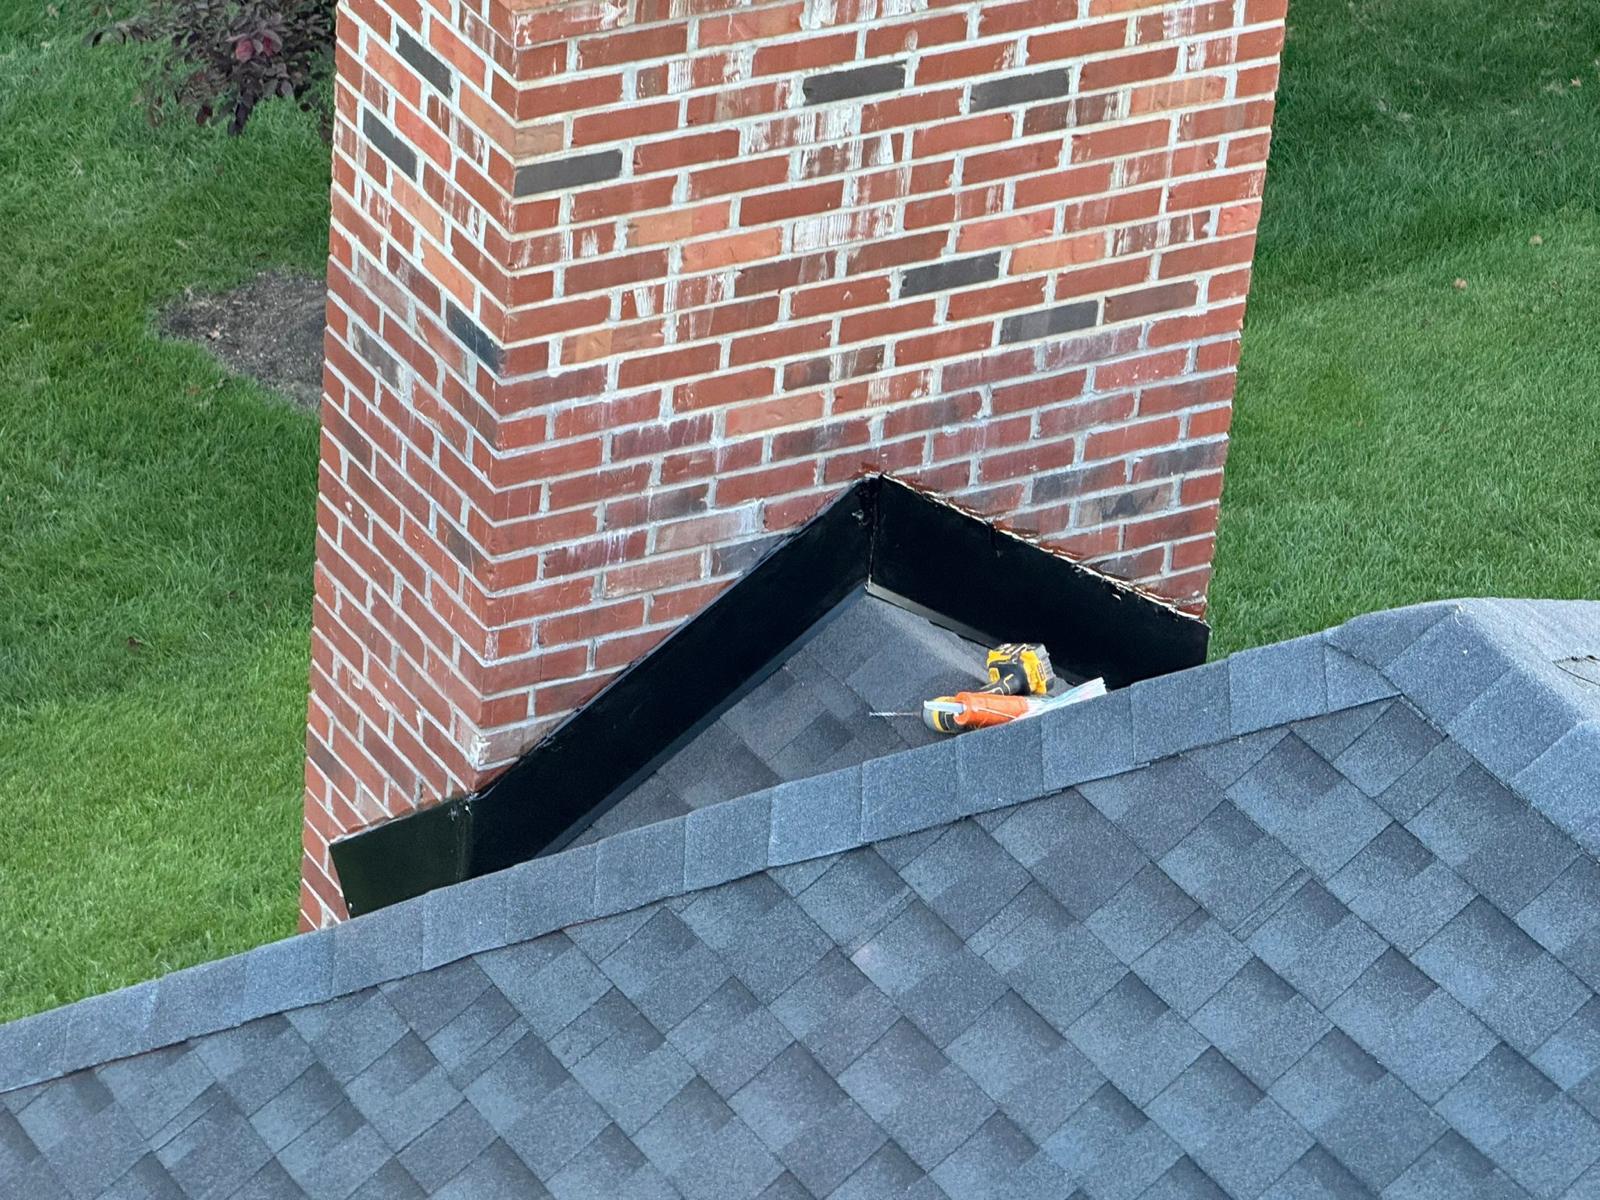
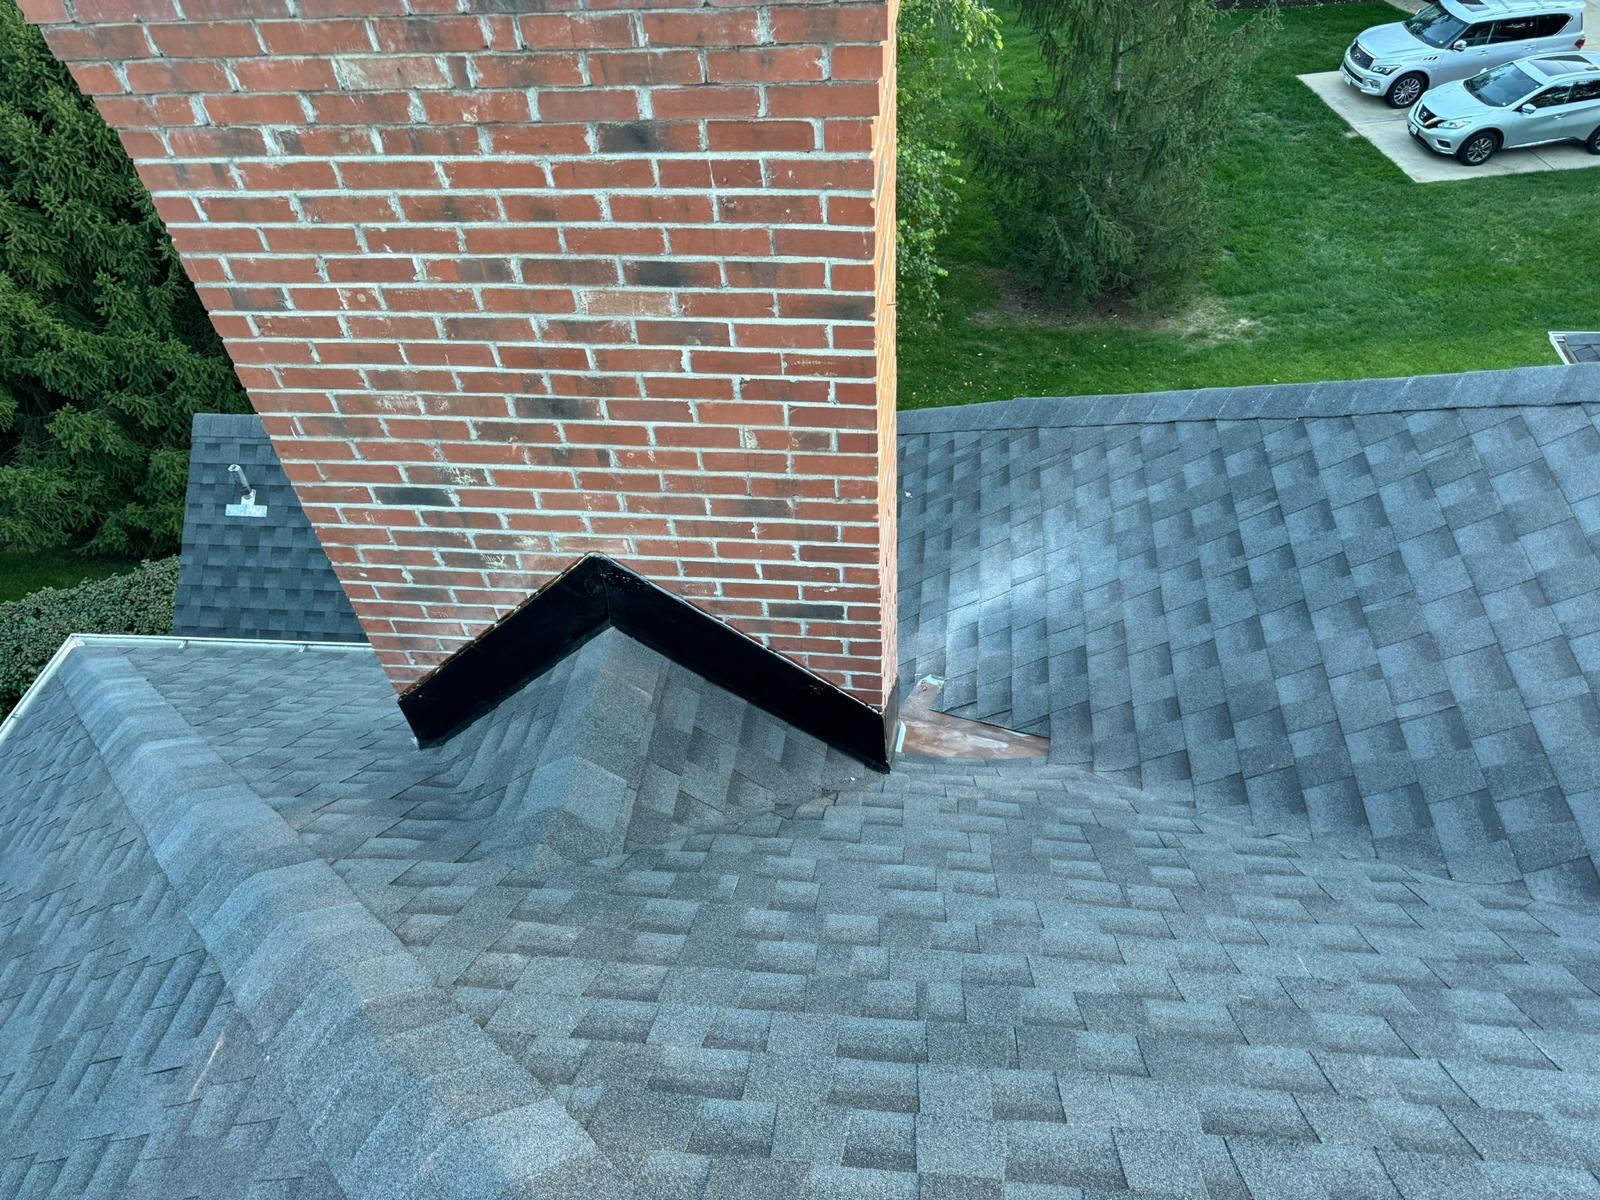
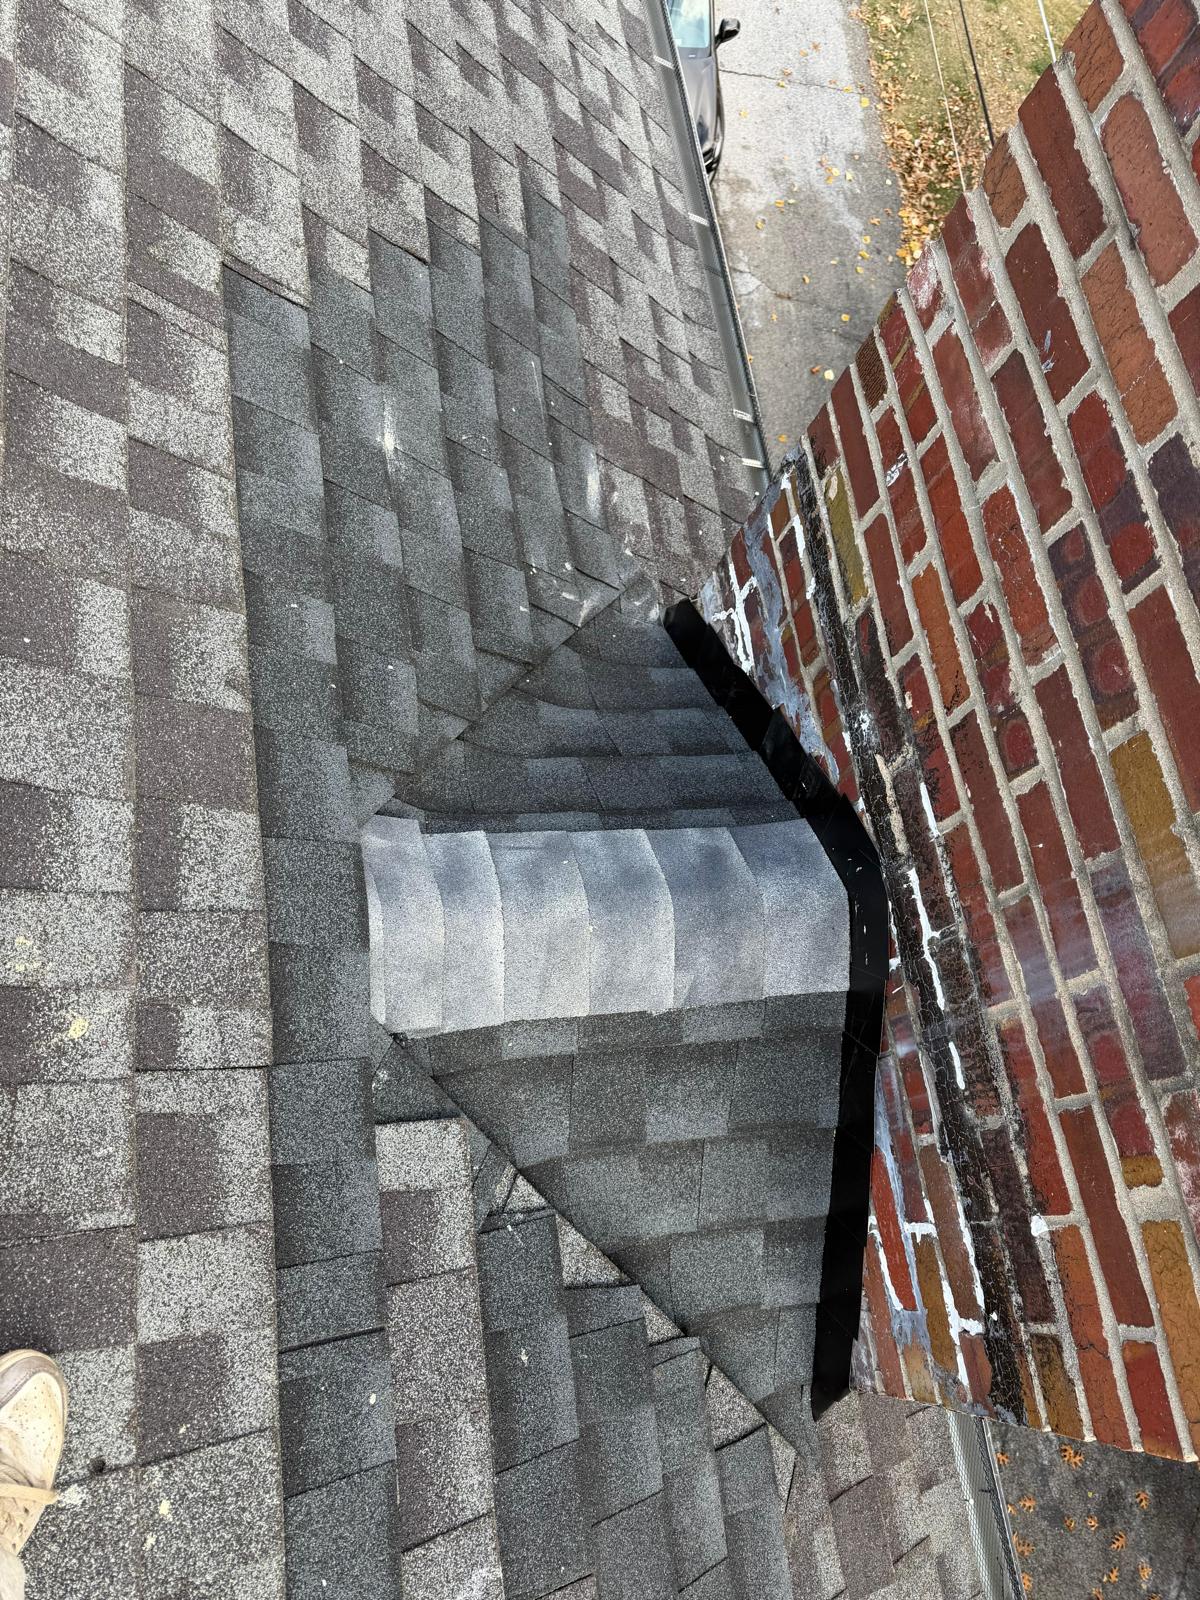
Full flashing replacement on a brick chimney — step flashing removed, new base and counter flashing bent and installed at the roofline. Two-phase process shown: flashing tucked into mortar joints and sealed, then finished with shingles wrapped tight to the chimney.
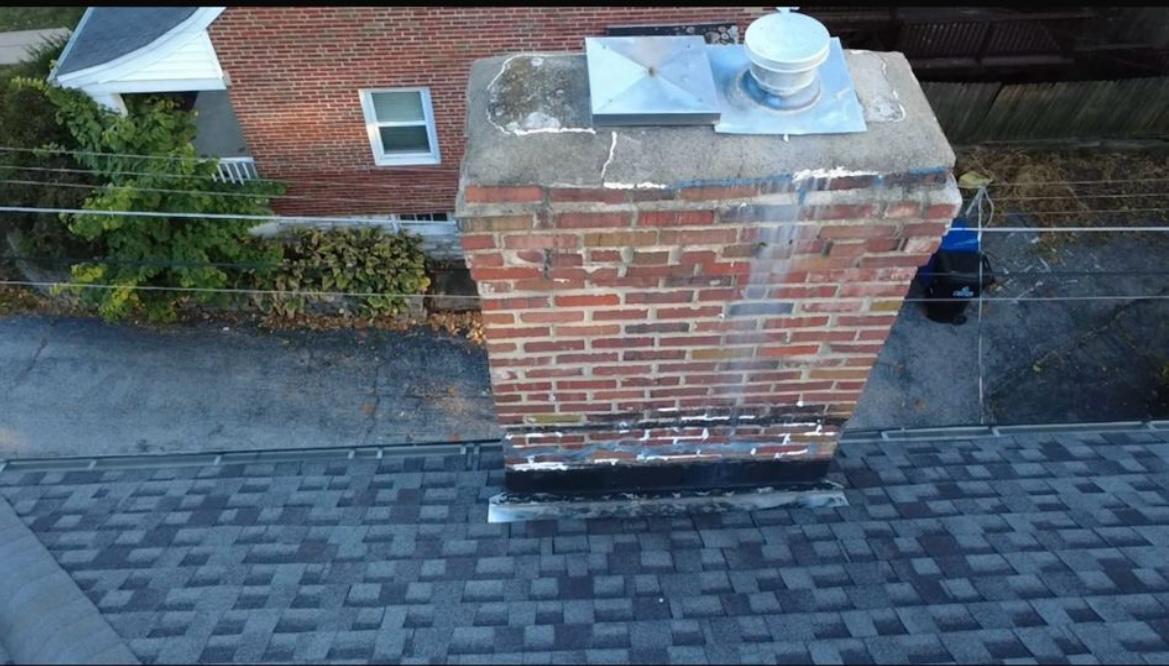
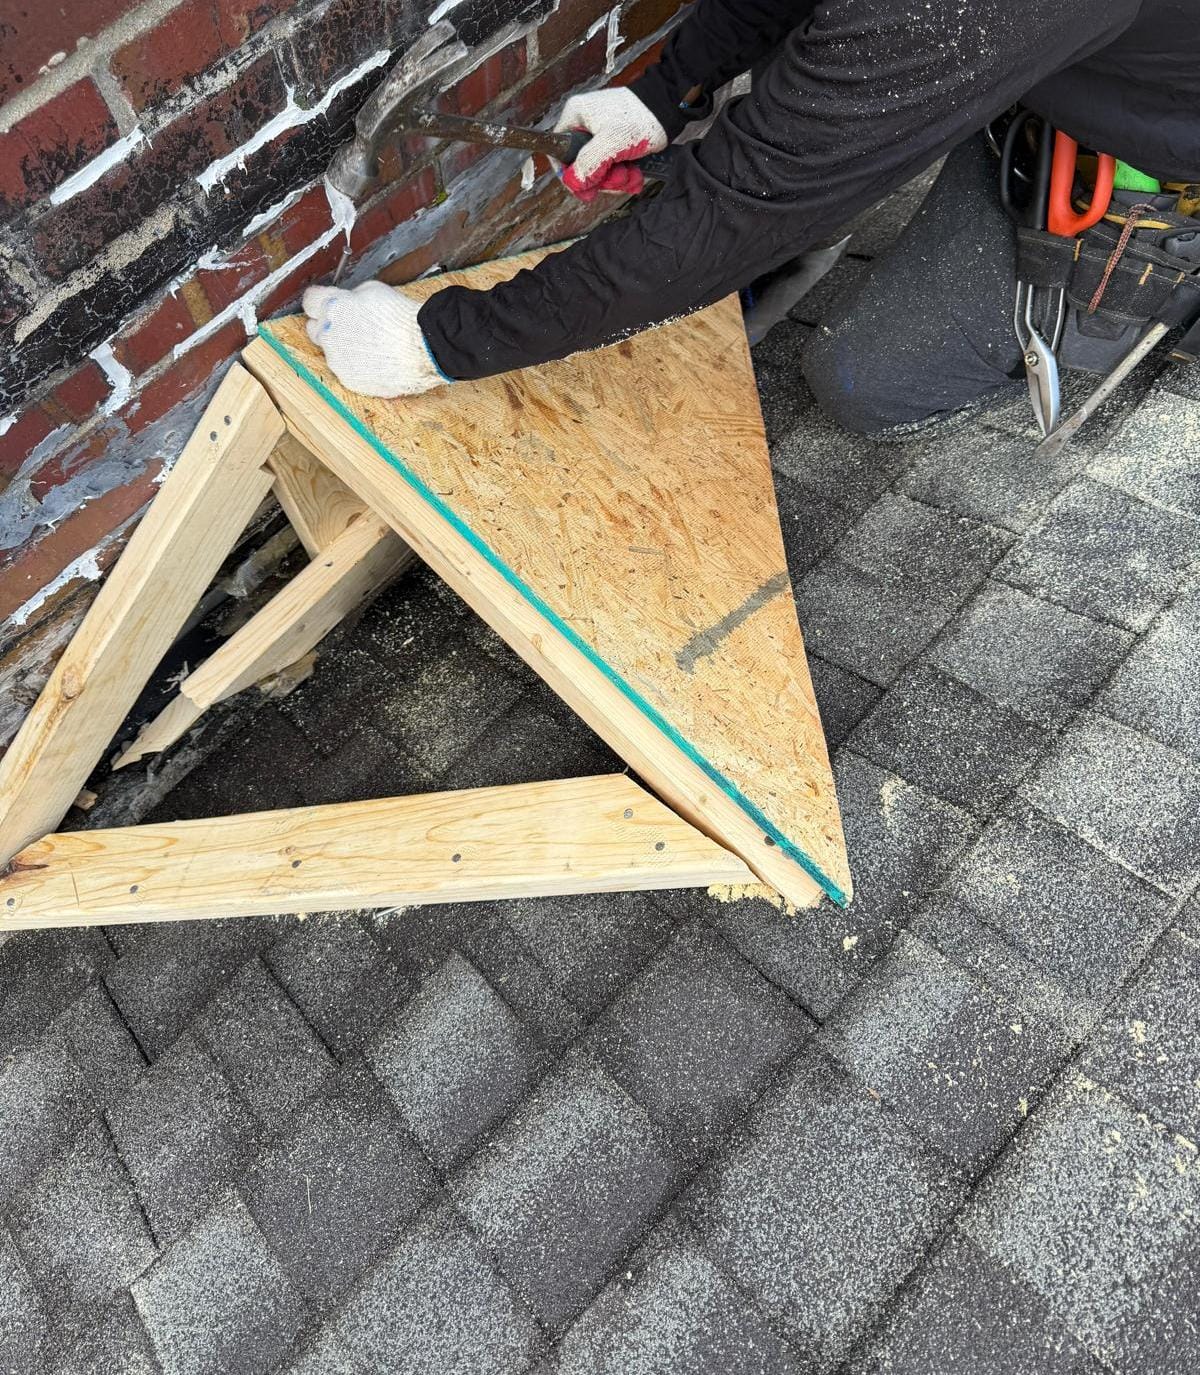
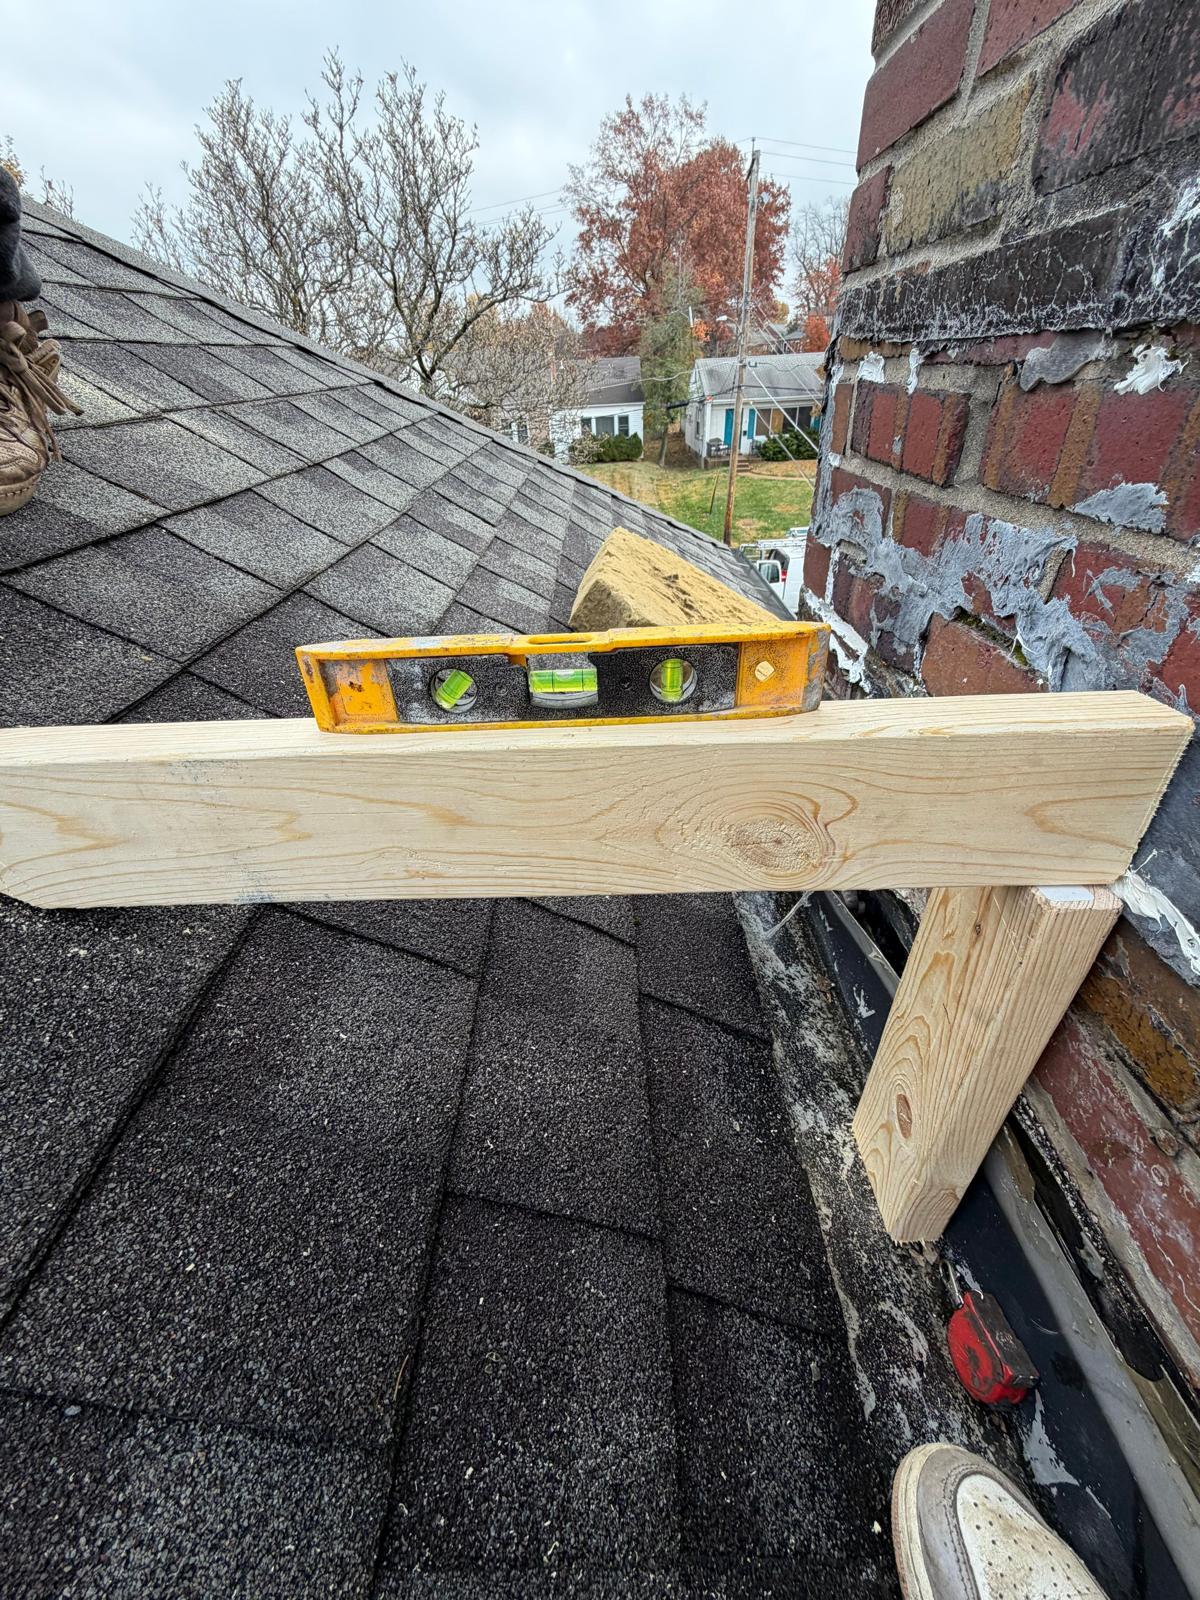
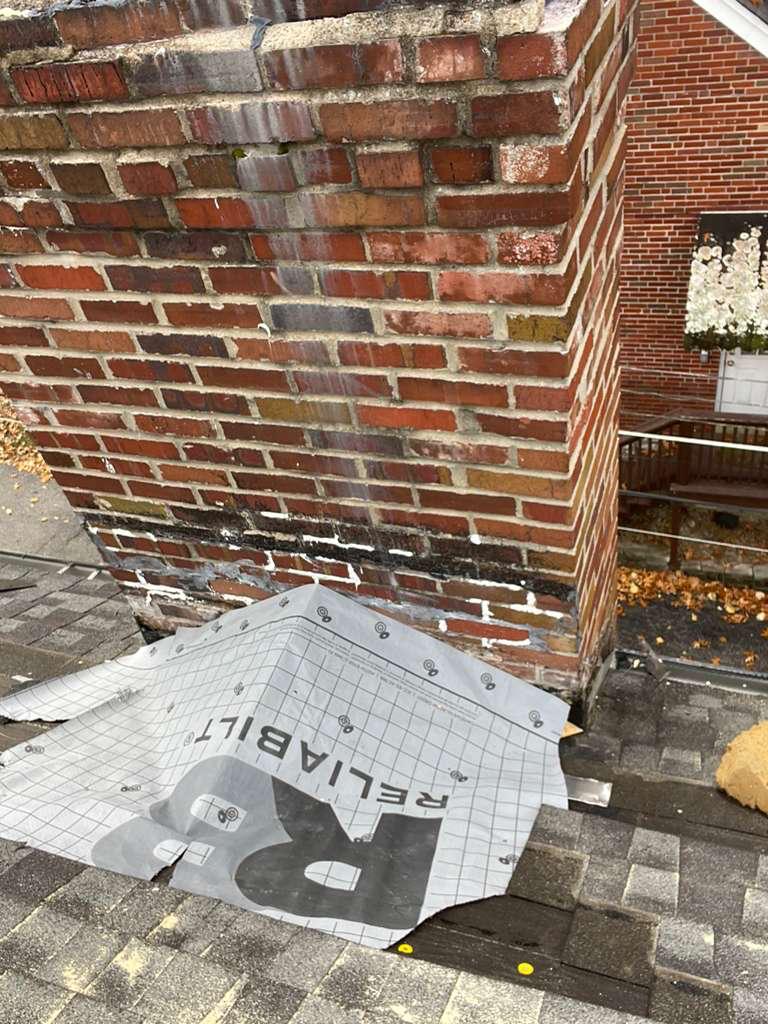
A chimney cricket is a peaked ridge built behind a wide chimney to divert rainwater around it instead of pooling against the back wall — the #1 cause of leaks on chimneys wider than 30 inches. Any chimney over 30" wide is required by code to have a cricket. This job shows the full build: framing, sheathing, leveling, waterproofing underlayment, and final shingled finish.
Before — No Cricket, Water Pooling
Process — Framing & Construction
After — Finished & Shingled
💡 What is a Cricket? A cricket (also called a saddle) is a peaked structure built on the uphill side of a chimney to shed water. Any chimney wider than 30 inches is required by building code to have one — without it, water accumulates behind the chimney and eventually works its way into the attic, rotting the framing and causing interior leaks. It's one of the most overlooked — and most important — components of a properly waterproofed chimney system.